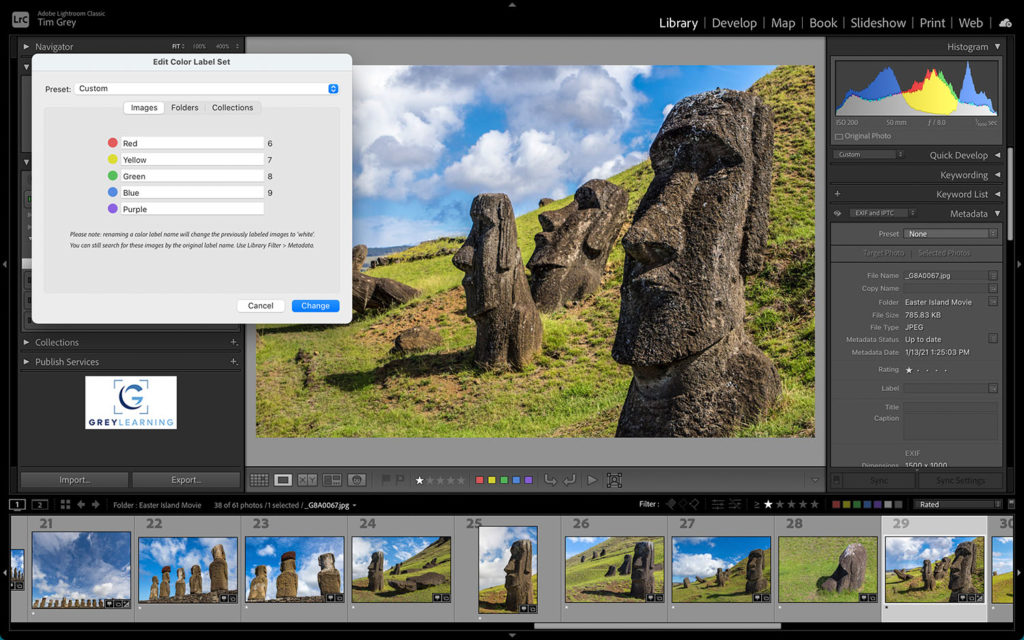
Navigate to Import Folder Automatically

Facebooktwitterlinkedin

Today’s Question: With the latest update to Lightroom Classic after importing a folder of images, Lightroom Classic does not automatically go to that folder. Is there a way to have the imported folder be the “current” folder I would work in automatically?

Tim’s Quick Answer: Yes, you can have Lightroom Classic remain in the folder you’re importing to as long as that folder already exists within your catalog at the time of import.

More Detail: By default, Lightroom Classic will navigate to an automatic collection that contains the photos you imported as soon as you initiate an import. During the import this collection is called “Current Import”, and after the import is completed, the collection will be called “Previous Import”. This collection is found in the Catalog section of the left panel in the Library module.

If you don’t want to be taken to this collection during or after an import, you can turn off the setting in the Preferences dialog. On Windows choose Edit > Preferences from the menu and on Macintosh choose Lightroom Classic > Preferences. In the Preferences dialog go to the General tab and turn off the “Select the ‘Current/Previous Import’ collection during import” checkbox.

However, turning off that option won’t automatically take you to a new folder you’re importing to. Rather, Lightroom Classic will simply continue to focus on the folder you had been browsing at the time you initiated the import, which obviously may not be the folder you’re importing into. Fortunately, you can change this by adding an extra step.

If you want to import into a new folder, start by creating the folder within Lightroom Classic. To the right of the Folders heading on the left panel in the Library module you’ll find a plus (+) button. If you want to create a folder within a folder that is already being managed in Lightroom Classic, click on that folder to select it and then choose “Add Subfolder” after clicking the plus button. If you want to create a new folder somewhere else, you can choose “Add Folder” from the popup instead.

Once you’ve created the new folder it will appear as an empty folder within the Folders list in the left panel. Click on that folder so it is active. Then right-click on the folder and choose “Import to this Folder” from the popup menu. This will bring up the Import dialog, where you can configure the import of new photos. Just be sure not to change the settings for the destination folder, as that will be set automatically to the folder you right-clicked on to initiate the import.

When you then click the Import button to begin the actual import, you’ll still be browsing the folder you are importing into, and thus will see the new photos as they are imported into the current folder.

Photo Book Printing Recommendations

Facebooktwitterlinkedin

Today’s Question: What is your recommendation on the best quality in photobooks? I see that Lightroom incorporates Blurb in their product and I have read good reviews about Mixbook photobooks.

Tim’s Quick Answer: The integration of Blurb in Lightroom Classic certainly provides convenience for many photographers, and Blurb also provides a good marketplace of options for photographers to sell their work. You might consider other services, some of which can provide improved print quality, such as Artifact Uprising, Printique, and Mixbook.

More Detail: If your top priority is image quality I recommend looking at Artifact Uprising (https://www.artifactuprising.com/photo-books). This will likely be among the most expensive photo book printing services you’ll find, but the quality is superb. This is a great choice for producing albums for a high-end wedding album, for example.

Also providing excellent print quality are Printique (https://www.printique.com) and Mixbook (https://www.mixbook.com). These services won’t be as expensive as a service such as Artifact Uprising, but still provide excellent print quality.

Blurb (https://timgrey.me/blurb) also provides very good print quality, along with some features that make it a great choice for photographers. If you’re a Lightroom Classic user you can design your photo book right within the Book module in Lightroom Classic. You can also use their special software to create a book.

Blur also provides an excellent marketplace, making it easy to offer your book for sale. And like many of the other photo book printers, there are a number of other printing options to choose from such as magazines.

In my experience any of the above options represent a great choice for photographers wanting to showcase their photos in book form. Choosing a specific service mostly involves deciding which specific features are most important to you for the book you’ll produce.

Camera versus Flatbed Scanner

Facebooktwitterlinkedin

Today’s Question: You recommended making a digital copy with a digital camera, rather than using a digital scanner. Was there a reason for this preference? Many folks already have printers with scanners built in. My multipurpose printer does such a good job that I got rid of my purpose-built flatbed scanner to save desk space in my home office.

Tim’s Quick Answer: My preference for using a digital camera rather than a flatbed scanner to digitize an old print is based on image quality. Specifically, sharpness and color fidelity will generally be better with a digital camera, even though a flatbed scanner offers advantages in terms of resolution and ease-of-use.

More Detail: Flatbed scanners are certainly easier to use compared to capturing a photo of a photographic print. Scanning takes a bit more time than capturing a digital photo, but getting the original configured on a copy stand with good lighting can more than make up for that time advantage.

Flatbed scanners often feature a higher effective resolution than many digital cameras. However, that doesn’t necessarily translate to improved image quality. In most cases you will get a sharper image by capturing a digital photo rather than scanning with a flatbed scanner.

To be sure, a good flatbed scanner can provide an image with very good quality, and for many older photographic prints this may be more than adequate. After all, an old photographic original won’t have tremendous resolution to begin with. However, when quality is the priority I recommend digitizing with a digital camera rather than a flatbed scanner.

When convenience is the priority, and especially if you have a scanner that has demonstrated good image quality, then obviously that is a perfectly great solution as well.

Today’s question, by the way, was a follow-up to my answer from August 10th about preserving old photographic prints, which you can find on my Ask Tim Grey blog here:

https://asktimgrey.com/2022/08/10/preserving-an-old-photo-print/

Pixology Magazine August 2022

Facebooktwitterlinkedin

The August 2022 issue of Pixology magazine is now available, featuring the following articles:

  • Telephoto Landscapes
    Going beyond the standard approach to landscape photography.
  • Mobile to Classic
    Streamline smartphone photo synchronization to Lightroom Classic.
  • Selecting Focus Points
    Tips for choosing which focus points to activate on your camera.
  • Style Transfer in Photoshop
    Explore unique creative possibilities with a Neural Filter in Photoshop.
  • Photo Story: In Praise of Haze
    Haze can be problematic for photography, until it isn’t.

Pixology magazine is included in the GreyLearning Ultimate Bundle, and is also available as a standalone subscription here:

https://www.greylearning.com/courses/pixology-magazine

How to “Save As” in Lightroom Classic

Facebooktwitterlinkedin

Today’s Question: I have a NEF file in Lightroom Classic that I would like to save as a JPEG. Everything I read says to go to “File” on the menu and choose “Save As”. Save As doesn’t come up. If I go to Photoshop “Save As” comes up. Am I supposed to move file from Lightroom Classic to Photoshop and then Save As?

Tim’s Quick Answer: The equivalent to the “Save As” command in Lightroom Classic for this type of situation would be to use the Export command. You can even enable the option to add the derivative JPEG image back to the catalog if you need to manage it alongside the original capture for any reason.

More Detail: The “Save As” command is really about making a new copy of a file while retaining the original. That is exactly what happens when you use the Export command in Lightroom Classic.

So, to get started you would select the photo (or multiple photos) you want to create JPEG copies of. You can then click the Export button at the bottom of the left panel in the Library module, which will bring up the Export dialog.

In this case you would want to make sure the Export To popup at the top of the dialog is set to “Hard Drive”. You can then designate the location where you want to save the JPEG copy of the selected images in the Export Location section. Note that one option is “Same folder as original photo” if you want the new copy to be stored alongside the original.

If you want to manage the JPEG copy alongside the original within your Lightroom Classic catalog, you can turn on the “Add to This Catalog” checkbox in the Export Location section. Note that I normally recommend keeping this checkbox turned off, because there isn’t generally a reason to manage derivative copies of source photos within the Lightroom Classic catalog in my opinion.

Since you want a JPEG copy you can select “JPEG” from the Image Format popup in the File Settings section. You can also take advantage of any of the other settings, such as to create a smaller version of the original by adjusting the settings in the “Image Sizing” section.

Once you’ve configured the desired settings you can click the Export button at the bottom-right of the dialog to create the JPEG copies from the selected originals. Those files will then be created based on your specifications, and if you chose to enable the “Add to This Catalog” checkbox the files will also be added to the current Lightroom Classic catalog.

Note that I covered the process of exporting copies of photos extensively in the lesson “Exporting Photos for Sharing from Lightroom Classic”, which is Chapter 4, Lesson 1 of my Lightroom Lectures video course. This course is included with the GreyLearning Ultimate Bundle (http://timgrey.me/atg99bundle), but is also available with the “Mastering Lightroom Classic” bundle here:

https://www.greylearning.com/bundles/lightroom-classic-bundle

Synchronizing Adjustments in Lightroom Classic

Facebooktwitterlinkedin

Today’s Question: I had a folder that contained JPEG versions of a series of images separate from the folder with the raw files. I mistakenly imported the JPEGs into Lightroom Classic and then used the Develop module on those JPEGs. Is there a way to get Lightroom Classic to take the adjustments I made to the JPEGs and then use them to continue working with the Raw files?

Tim’s Quick Answer: Yes, you can synchronize the adjustments from the JPEG images to the associated raw captures using the Sync feature in the Develop module in Lightroom Classic.

More Detail: Lightroom Classic enables you to synchronize the adjustments from one image to one or more other images in a variety of ways. This could be used to apply the same adjustments to multiple images captured under similar conditions, or in this case to synchronize adjustments from a JPEG image to a related raw capture that was part of a Raw+JPEG pair.

Since the adjustments are likely unique to each image pair, that does unfortunately mean that you’ll need to work with one pair of images at a time, which means applying the adjustments to a large number of images could be a little bit time consuming.

The first thing you’ll need to do is make sure all the images are in your Lightroom Classic catalog. So, if you haven’t already imported the raw captures I suggest importing them into the same folder as the JPEG images.

You can then select the pair of photos you want to synchronize. You can simply click on the first image and then hold the Shift key on the keyboard while clicking on the second image, for example. Then make sure the image you already applied the adjustments to is the active image, which you can do by clicking on the thumbnail (not the frame around the thumbnail) for that photo.

In the Develop module you can then click the Sync button at the bottom of the right panel. In the dialog that appears turn on the checkboxes for the adjustments you want to sync. You can synchronize all adjustments by clicking the Check All button in the Synchronize Settings dialog. Then click the Synchronize button, and the adjustments will synchronize to the selected images.

Text Size in Lightroom Classic

Facebooktwitterlinkedin

Today’s Question: I want to know if the text in Lightroom Classic can be larger. In your classes it is bigger.

Tim’s Quick Answer: There is a font size option in Preferences in Lightroom Classic, but this setting won’t make a significant difference. The other option is to set the display at a lower resolution so the text and overall interface will appear larger.

More Detail: The text in Lightroom Classic is relatively small, which can make it somewhat difficult to read. There are a couple of changes you can make that will help.

First make sure the Font Size popup is set to “Large”. This control is found on the Interface tab of the Preferences dialog. After changing this setting you’ll need to quit and restart Lightroom Classic for the change to take effect. Unfortunately, the Large setting for Font Size has a relatively modest impact on the text size within Lightroom Classic.

The other option is to reduce the display resolution through the operating system. At a lower display resolution, the interface elements (including text) will appear larger, though this obviously also means you can’t see as much on the screen at one time.

When I am presenting Lightroom Classic I often set the resolution down to just 1280×720 pixels to make the text and interface elements easier to see. The highest resolution I use in this type of situation is 1920×1080. As long as you don’t mind the low overall resolution, this approach will make the text in Lightroom Classic easier to read.

Cloud for Download without a Laptop

Facebooktwitterlinkedin

Today’s Question: In response to your answer about downloading photos while traveling without a laptop, would it be possible to use cloud storage as an alternative to a hard drive for photo storage?

Tim’s Quick Answer: Yes, you could use cloud-based storage as an alternative to downloading to a hard drive, as long as you are confident that you’ll have reliable access to high-speed internet. If the cloud storage will be your exclusive option, you may also want to bring enough memory cards so you don’t have to reformat them along the way.

More Detail: If you’re going to be traveling without a laptop, and you’d prefer to not bring along an external hard drive either, you could use cloud-based storage as the basis of downloading your photos along the way.

For example, the Lightroom mobile app provides a good solution for this type of workflow. You can connect a card reader adapter to your mobile device, and import those photos into the Lightroom mobile app. Those images will then synchronize to the cloud, and would then be available in the full Lightroom ecosystem, including in your Lightroom Classic catalog that has synchronization enabled. When you get hom you could then transfer the photos to your local storage.

The key thing to keep in mind is that with cloud-based storage you’re depending upon a remote server to manage and back up your photos. If like me you prefer to manage a local copy of your photos the cloud-based solution should be thought of as a remote backup rather than primary storage.

One way you could work around this limitation would be to bring along enough memory cards so that you don’t need to format and reuse any cards along the way. The memory cards could then serve as a backup, with the cloud-based Lightroom storage being the primary copy of the photos, which you can move into your normal workflow when you get home.

Note, by the way, that even if you’re not using Lightroom Classic as the foundation of your workflow for organizing your photos, you could still use this approach of employing the Lightroom mobile app for downloading photos while traveling. When you return home you could then use Lightroom Classic as a temporary tool for getting the photos to your normal local storage and continue your workflow using other software.

Download without a Laptop

Facebooktwitterlinkedin

Today’s Question: I am preparing to spend 4 weeks in Japan. In the past, I used portable external hard drives. I do not use a laptop. Is there a 5TB unit that you recommend that can be charged from a wall outlet and can load CompactFlash cards?

Tim’s Quick Answer: There isn’t a standalone option that provides a perfect solution. In the absence of a laptop, I recommend using a mobile device (such as a smartphone or tablet) to transfer from media cards to a hard drive.

More Detail: A somewhat ideal solution here would be a portable storage device that enables you to download directly from the media cards out of your camera. There have been various such devices over the years, none of which have been particularly ideal. The most recent drive like this that used to be a good option is the Gnarbox (https://bhpho.to/3p1cfhN). However, the company appears to have gone out of business even though the units are still available for sale from some outlets.

Without any great options for standalone storage devices that can download directly from a media card, I think the best approach is to use a smartphone or tablet. You will need appropriate adapters for the card reader and the hard drive and may need power to the connector for the hard drive depending on the device you’re using.

Once you have the necessary adapters, you can use the smartphone to transfer photos from the media card and to the hard drive. Depending on the approach you use, you may need to download to your mobile device and then transfer to the hard drive. For Android devices this process is relatively straightforward, as Android offers relatively broad support for simple file transfers.

For iPhone or iPad users you will likely either want to use the Files app for transferring photos from a media card and to an external hard drive. There are also other apps, such as options from hard drive manufacturers intended to expand your mobile device storage capacity.

Admittedly, none of the available options for downloading photos without a laptop represent what I would consider an ideal solution. For this reason, I prefer to travel with a laptop, both for photo downloading and other uses. However, it is possible to use a mobile device in place of a laptop for this purpose.

Restoring Old Photoshop Gradients

Facebooktwitterlinkedin

Today’s Question: Some time ago with a Photoshop update the default gradients were replaced by a series of gradients that each represent one basic color. I would often use the previous gradients for various creative effects. Is there any way to get those old gradients back?

Tim’s Quick Answer: Yes, you can access the old gradient presets by enabling the Legacy Gradients option on the Gradients panel in Photoshop.

More Detail: When Adobe changed the default gradient presets in Photoshop a while back, the original gradients were left out. Fortunately, there is a way to restore access to the original default gradient presets from earlier versions of Photoshop.

To get started, bring up the Gradients panel by choosing Window > Gradients from the menu in Photoshop. On that panel you’ll see a list of folders matching the gradient presets you can find elsewhere, such as with the Gradient tool. These are primarily organized by color, such as options for “Blues” and “Pastels”.

If you don’t see a “Legacy Gradients” folder on the list, click the panel popup menu, which is an icon showing three horizontal lines at the top-right of the Gradients panel. On the popup menu that appears choose “Legacy Gradients”. At this point you will see a Legacy Gradients folder on the Gradients panel, and within that folder you’ll find the original gradient presets you’ve been missing.

Once you have enabled the Legacy Gradients presets on the Gradients panel, you’ll also find those presets elsewhere, such as on the gradient preset popup on the Options bar for the Gradient tool, and within the same popup available for the Gradient Map adjustment layer, among other options.