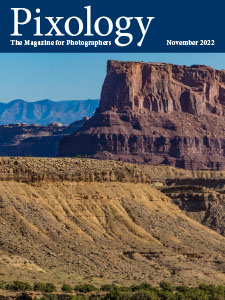
Pixology Magazine November 2022

Facebooktwitterlinkedin

The November 2022 issue of Pixology magazine is now available, featuring the following articles:

  • New Features in Lightroom Classic 12: Powerful new features in the latest update to Lightroom Classic, including content-aware image cleanup and improved masking for targeted adjustments.
  • New Features in Photoshop 2023: Details of the latest updates to Photoshop, which add interesting improvements.
  • Calculating Depth of Field: Learn to plan your photos and gain a better understanding of the factors impacting depth of field.
  • Date-Based Folders: Recommendations for using a careful and consistent approach to make the most of date-based folders for your photos.
  • Photo Story: Shadows on the Interstate: A play of light and shadows added a slight delay on a road trip that wasn’t actually focused on photography.

Pixology magazine is included in the GreyLearning Ultimate Bundle, and is also available as a standalone subscription here:

https://www.greylearning.com/courses/pixology-magazine

Finding Photos where Flash Fired

Facebooktwitterlinkedin

Today’s Question: Is there a way in Lightroom Classic to find photos where I used the flash? I’m assuming there must be, but I can’t find it!

Tim’s Quick Answer: Yes, you can filter photos based on those where the flash fired (or did not fire) using the Flash State column on the Metadata tab of the Library Filter bar.

More Detail: I often say that whatever details you can remember about a photo you’re looking for can probably be used to locate that photo in Lightroom Classic. That is certainly true when it comes to finding photos where the flash fired (or where the flash did not fire). This is made possible by the Flash State column on the Metadata tab of the Library Filter bar.

First, in the Library module, make sure the Library Filter bar is visible above the grid view display. If the Library Filter bar isn’t there, you can press the backslash key (\) on the keyboard or go to the menu and select View > Show Filter Bar. Make sure you’re browsing the folder or collection you want to locate photos within.

On the Library Filter bar go to the Metadata tab. If there are other criteria you want to use for your search, such as the date of capture or the camera that was used, you can specify those among the columns of metadata available. To search by whether the flash fired click the heading for one of the columns and choose “Flash State” from the popup. This column will now show options based on the attributes of the photos you’re currently browsing. If there are photos in the current location for which the flash fired, you’ll see a “Did fire” option in the Flash State column, with a number to the right indicating how many photos match the criteria. If there are photos where the flash was not used, you’ll also see a “Did not fire” option with a count for the number of photos to the right.

Simply click the desired option to filter the current photos to those where the flash did fire (by selecting “Did fire”) or where flash wasn’t used (by selecting “Did not fire”).

Keep in mind that you can also add other metadata options for the overall filter, such as by including the Attribute tab as part of your search. You may, for example, want to filter photos that have a particular star rating as well as where the flash fired, to track down your favorite photos captured with flash.

21 Years of Ask Tim Grey!

Facebooktwitterlinkedin

Today marks 21 years since I started publishing the Ask Tim Grey eNewsletter!

To celebrate this milestone we’ve launched a new weekly series video course called “Tim Talks Weekly”, which you can opt to get for half price.

You can also show your appreciation of the Ask Tim Grey eNewsletter by buying me a coffee, or by getting a copy of the eBook I published last year called “Behind the Answers”. Get all the celebratory details here:

https://www.greylearning.com/pages/atg21

Thanks for being part of a great 21 years!

Create Your Own Adaptive Presets

Facebooktwitterlinkedin

Today’s Question: The new adaptive presets in Lightroom Classic have caught my interest, but I find that many of the available adjustments don’t suit my needs. Is it possible to create your own adaptive presets with custom adjustments?

Tim’s Quick Answer: Yes, you can indeed create your own adaptive presets by including the mask along with the adjustments when saving a preset.

More Detail: The new adaptive presets in Lightroom Classic 12 provide automatic adjustments that only affect specific areas of a photo, including people, the sky, or the key subject. When you apply one of these presets the image is analyzed so that the adjustment only affects the designated area of the image.

You can also create your own adaptive presets based on one of the automated masking features, so that a preset can apply to the background, the key subject, the sky, or specific features of the people who appear in your photos. While you use a specific photo to create a mask for the targeted adjustment, when you save a preset with those adjustments the effect will be customized based on the photo the preset is applied to.

Start by selecting a representative image in Lightroom Classic. Then, in the Develop module, use the Masking feature to apply a targeted adjustment using one (or more) of the automated mask options. Adjust the settings for any adjustments you want to apply to the area defined by the mask.

You can then click the plus (+) button to the right of the Presets heading on the left panel and choose “Create Preset” from the popup menu. In the New Develop Preset dialog enter a descriptive name for the preset in the Preset Name field and choose which group you want to save the preset in from the Group popup.

You can then turn on the checkboxes for only the adjustments you want to include in the new preset. For a targeted adjustment be sure to turn on the “Masking” checkbox, which is the key to creating an adaptive preset based on an automated masking feature. Click the Create button to save the preset.

You can then apply that preset to other images, and the targeted adjustment will be customized based on the contents of the image.

I have covered the process of creating adaptive presets in the first episode of my new “Tim Talks Weekly” video course, which will feature a new episode every week. You can learn more about this course, including how you can get it for half price in celebration of the 21st anniversary of the Ask Tim Grey eNewsletter, on the GreyLearning website here:

https://www.greylearning.com/courses/tim-talks-weekly

Crop Tool Zoom Fail

Facebooktwitterlinkedin

Today’s Question: The Crop tool in Photoshop is driving me crazy. When I try to zoom in to make sure I’m cropping well at the edges and corners the image moves so that I’m not looking at the area of the image I zoomed in on. Is this a bug or is there a way to fix this annoying behavior?

Tim’s Quick Answer: The behavior you’re describing for the Crop tool in Photoshop can be disabled by turning off the “Auto Center Preview” checkbox.

More Detail: By default, Photoshop will center the image automatically when working with the crop tool. If you drag to define the area of the image you want to retain when cropping, that area will shift to the center. While this behavior can be helpful, it can also be quite frustrating when you’re trying to zoom in on a corner or edge of the photo you’re cropping.

To disable this automatic centering, select the Crop tool from the toolbar and then click the gear icon on the Options bar to bring up a settings popup. On that popup turn off the “Auto Center Preview” checkbox. The image will no longer center automatically to the cropped area, enabling you to zoom in to check the specific positioning of the crop edge without having to pan around after the image centers itself.

Note, by the way, that you can zoom in on a specific area of the image while using the Crop tool without the need to switch to a different tool. If you hold the Ctrl+Spacebar keys on Windows or the Command+Spacebar keys on Macintosh, you’ll have access to the Zoom tool without actually switching to the tool. You can then click-and-drag on the area of the image you want to take a closer look at, and the image will be zoomed in on that area when you release the mouse. With the “Auto Center Preview” checkbox turned off you’ll actually be seeing that area, rather than having the image pan so that you’re looking at the center rather than the area you wanted to get a closer look at.

Calculating Equivalent Exposure

Facebooktwitterlinkedin

Today’s Question: Is there a smartphone app you can recommend for calculating the new shutter speed to use when adding a solid neutral density filter after determining the exposure without the filter?

Tim’s Quick Answer: Yes, I recommend the PhotoPills app, which includes an Exposure feature you can use to calculate equivalent exposure settings, including when using a solid neutral density filter.

More Detail: I use and recommend the PhotoPills app as a powerful tool for planning various details related to photography. I often use the app for planning photos that incorporate the sun or moon, but there are many other features included as well. That includes the ability to calculate equivalent exposure settings with the Exposure “pill” in PhotoPills.

Within the PhotoPills app navigate to the Exposure pill. Set the Calculate option to the exposure setting you want to adjust, which in the case of adding a solid neutral density filter would typically mean adjusting the shutter speed.

You can then enter in the known-good exposure settings in the “Test settings” section. In the “Equivalent settings” section you can adjust the “other” exposure settings based on how you intend to change the settings. For example, when calculating a new shutter speed you might opt for different lens aperture and ISO settings.

At the right side of the “Equivalent settings” section you’ll also find an option to specify a solid neutral density filter you’ll use. Set the number of stops for the filter you’ll use, and the exposure settings will update accordingly.

Based on the updated settings you’ve selected, and the exposure setting you’re calculating for, the new setting will appear below the “Equivalent settings” section. For example, if you’re calculating a new shutter speed you’ll see that value shown based on the known-good test settings and taking into account the equivalent exposure settings you’ve established.

You can find the PhotoPills app for iOS and Android mobile devices here:

Apple iTunes Store (iOS devices): https://timgrey.me/photopills

Google Play Store (Android devices): https://timgrey.me/androidpills

To learn more about using PhotoPills, check out my comprehensive video course available through my GreyLearning website here:

https://www.greylearning.com/courses/photopills

Enabling Badges on Filmstrip

Facebooktwitterlinkedin

Today’s Question: You referred to a badge on thumbnails on the filmstrip indicating photos that had been adjusted in the Develop module. I see those badges in the grid display of thumbnails, but not on the filmstrip. Should they also appear on the filmstrip, and if so how do I get them back?

Tim’s Quick Answer: You can enable (or disable) badges for thumbnails on the filmstrip in Lightroom Classic using the “Show badges” checkbox in Preferences.

More Detail: Lightroom Classic uses small icons called badges to indicate various status options for images. That includes a badge that indicates an image has been adjusted in the Develop module.

The badges on the filmstrip are controlled by the “Show badges” checkbox in Preferences. To adjust the setting start by choosing Edit > Preferences on Windows or Lightroom Classic > Preferences on Macintosh. Go to the Interface tab in the Preferences dialog, where you’ll find the “Show badges” checkbox in the Filmstrip section. Turn the checkbox on if you want the badges displayed, or off if you want the badges hidden.

There are separate settings that relate to the display of badges in the grid view. To adjust those settings go to the Library module and choose View > View Options from the menu. On the Grid View tab you can then configure the overall display of the grid view, and choose whether you want the badges to appear on thumbnails. The badges in this case are controlled by the “Thumbnail Badges” checkbox found in the Cell Icons section of the Grid View tab.

Note that you can learn about the meaning of the individual thumbnail badges for Lightroom Classic in an article on the GreyLearning blog here:

https://greylearningblog.com/meaning-of-thumbnail-badge-icons-in-lightroom-classic/

Deleting Develop Presets

Facebooktwitterlinkedin

Today’s Question: I have loaded purchased presets in Lightroom Classic. However, I don’t use them and want to delete them rather than just hiding them. Is there a way to delete an individual present or a group of presets?

Tim’s Quick Answer: Yes, you can delete custom presets (or a group of presets) in Lightroom Classic by right-clicking on the preset (or group) and choosing “Delete” (or “Delete Group”) from the popup menu.

More Detail: Presets you create or import in Lightroom Classic can be deleted so they are removed both from the Presets section of the left panel in the Develop module and removed from the hard drive as well.

To delete a preset (or group of presets) you can simply right-click and choose the option to delete from the popup menu that appears. If you want to confirm the preset is deleted, or you prefer to delete the files directly, you can browse the folder that contains the Develop presets.

To browse the preset location on your hard drive, right-click on any custom preset (not one that is included with Lightroom Classic) and choose “Show in Finder” if you’re using Macintosh or “Show in Explorer” if you’re using Windows. This will bring up a window in your operating system that shows all the custom presets, which are saved as XMP files.

If there are any unwanted presets in this folder, you can delete them as you would any other file through your operating system. After restarting Lightroom Classic, any presets you deleted directly from the hard drive will no longer appear in the Presets section of the left panel in the Develop module. If you delete all presets from a given group so that the group is empty, that group will be removed from the Presets section as well.

Develop Badge from Preset

Facebooktwitterlinkedin

Today’s Question: If you apply a preset that includes “Remove Chromatic Aberration” and “Enable Profile Corrections,” will the thumbnail strip at the bottom indicate that a given image has undergone an adjustment in the Develop module? I like the thumbnails to remain “clean” so I know which images are completely unaltered.

Tim’s Quick Answer: Yes, if you apply a Develop preset to an image the status will be updated to indicate that it has had adjustments applied. That will include the display of a badge indicating that adjustments have been applied if you have enabled those badges for thumbnails.

More Detail: I prefer to include adjustments such as chromatic aberration removal and profile-based lens corrections with a preset I apply when importing new photos into Lightroom Classic. You can also apply a preset in batch at any time, as I explained in the Ask Tim Grey eNewsletter on October 19th. In either case, the thumbnails for images will display a badge indicating that adjustments have been applied, as long as you have those badges enabled.

In other words, images will be marked as having been adjusted in the Develop module even if you didn’t directly apply adjustments in the Develop module. Applying a preset at import or later in your workflow (such as with the Quick Develop option in the Library module) still counts as having applied adjustments in the Develop module. This makes sense, of course, since presets really represent saved settings from the Develop module.

So, if you prefer to not have images marked as having adjustments applied unless you intentionally applied those adjustments, you should not apply a preset in batch to a large group of images. Instead, if you’re going to use a preset as part of the process of applying adjustments, you should be sure to only apply that preset to the specific images you’ll be working on, so that only those images will be marked has having been adjusted.

Adaptive Presets in Lightroom Classic 12

Facebooktwitterlinkedin

Today’s Question: I’m not clear on what “adaptive” means when it comes to the new adaptive presets in Lightroom Classic 12. Do the adjustments vary depending on the image? That doesn’t seem to be the case based on my testing so far.

Tim’s Quick Answer: The “adaptive” part of the new adaptive presets refers to the mask that causes the adjustment contained within the preset to apply to only a portion of the image. In other words, Lightroom Classic is creating a mask based on image analysis and applying the preset adjustments to the image based on the area defined by the mask.

More Detail: The new version 12 of Lightroom Classic includes several groups of new presets referred to as “adaptive” presets. These are divided into groups of Adaptive: Portrait, Adaptive: Sky, and Adaptive: Subject. Each of these groups of presets apply adjustments to specific areas of an image based on image analysis, which obviously relates to people, the sky, or the key subject.

Each of these groups of presets is based on one of the automatic masking features available in the updated Masking controls in Lightroom Classic 12. The adaptive preset groups therefore relate to the Select People, Select Sky, and Select Subject mask options, respectively.

When you apply an adaptive preset to a photo the image is analyzed and a mask is created automatically based on AI (artificial intelligence) technology. Once the mask is created, the adjustments saved with the preset are applied to the applicable area of the image. As a result, you will then see a new mask on the Masks panel after applying one of the adaptive presets to an image.

You can learn more about how the new adaptive presets work, along with the other new features of Lightroom Classic 12, in my video lesson “New Features in Lightroom Classic 12”, which is included in the “Lightroom Lectures” course of the “Mastering Lightroom Classic” bundle available here:

https://www.greylearning.com/bundles/lightroom-classic-bundle