
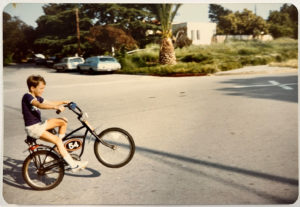
 A house that has been in my family for over 100 years, and that I was fortunate enough to visit my great-grandmother at when I was a child, was sadly destroyed completely in the recent wildfire in Pacific Palisades, California. This reminded me of the importance of digitizing analog photos in the form of slides, negatives, and prints, and so I put together a video with some recommendations. You can view that video on my “Tim Grey TV” channel on YouTube here:
Slide Scan Settings
Today’s Question: What settings do you recommend when having slides scanned such as with the ScanMyPhotos service you recommended in your recent video?
Tim’s Quick Answer: I recommend having your slides scanned at 4,000 pixel per inch resolution. If you want to maximize image quality I recommend saving the images as TIFF files. If you’re simply digitizing to preserve photo memories, then saving as JPEG is perfectly fine.
More Detail: When scanning slides or negatives, I recommend using the highest optical resolution available for the scanner. In the case of the ScanMyPhotos service (https://www.timgreyphoto.com/scan), that means 4,000 pixel per inch scanning. Note that for prints I typically scan at 600 dpi, because prints don’t contain as much information as film images.
As noted in the video I recently shared, in my case the slides I was having scanned date back to my early days in photography, and so they don’t represent my best work. As such, I was perfectly happy to have the scanned images saved as JPEG files so they wouldn’t consume as much storage. However, if you anticipate printing the images or otherwise want to ensure maximum quality, I recommend saving the images as TIFF files.
If you missed my video about digitizing your analog photos, you can find it on my “Tim Grey TV” channel on YouTube here:
![]()
Correcting Color Fringe
Today’s Question: I am reworking an older file that I took several years ago. I really like the image but there are some red artifacts in the unprocessed raw file that I can’t seem to correct. Is it normal to have artifacts in an unprocessed raw file?
Tim’s Quick Answer: The color fringing you’re seeing are chromatic aberrations and can be corrected using the Lens Corrections adjustments in Lightroom Classic or the Optics adjustments in Camera Raw or Lightroom.
More Detail: Chromatic aberrations are a type of visible artifact caused by certain lenses, particularly wide-angle lenses and lenses of relatively low quality. Fortunately, these artifacts can generally be corrected somewhat easily.
The first step is to turn on the “Remove Chromatic Aberration” checkbox on the Profile tab under Lens Corrections or Optics. I generally find this provides a good solution about half the time, and when it doesn’t resolve the issue, you can switch to the Manual tab.
On the Manual tab you can increase the value for the Amount sliders for Purple and Green, depending on which colors are present. These sliders affect the strength of the correction being applied to reduce the appearance of chromatic aberrations.
You can also use the two slider handles to adjust the Purple Hue and Green Hue ranges as needed. You want to expand the range enough to cover the full range of colors seen in the chromatic aberrations, but not so much that the effect impacts surrounding colors. For example, if you expand the Green Hue range to extend too far into blue, it could affect areas of sky.
By carefully balancing the strength of the effect for each color along with the range of color values being affected, in most cases you can greatly reduce the appearance of the chromatic aberrations. With many images that will translate to a complete correction without any color artifacts remaining.
![]()
Catalog Location Strategy
Today’s Question: What is the best configuration to use the same Lightroom Classic catalog on two computers? Do I need to move the catalog to an external hard drive?
Tim’s Quick Answer: Yes, if you want to be able to access the same Lightroom Classic catalog on more than one computer, my recommendation is to keep the catalog on an external hard drive. For convenience, I suggest keeping the catalog on the same external hard drive where your photos are stored.
More Detail: The core architecture of Lightroom Classic does not support storing the catalog on a network volume, which limits your options when it comes to accessing your catalog from more than one computer. While it is feasible to store the catalog on a cloud-based storage platform such as Dropbox or OneDrive, I don’t recommend doing so because of the risk of corruption or a lack complete synchronization.
Therefore, if you want to be able to access a single catalog on more than one computer, the approach I recommend is to store the catalog on an external hard drive along with your photos. You can then connect that external hard drive to any computer with Lightroom Classic and open the catalog from the external hard drive.
If you want to take this approach, first quit Lightroom Classic so the catalog won’t be in use. Then copy the folder that contains your catalog and related files to the external hard drive. Once the folder is copied, rename the original to indicate it is now just a backup copy, such as by adding “Backup” to the beginning of the folder name.
You can then double-click the catalog file (with the .lrcat filename extension) from the folder on your external hard drive to open that catalog in Lightroom Classic. Windows users should note that they’ll need to be sure the external hard drive retains the same drive letter on each computer, so Lightroom Classic can find them where they are expected.
![]()
Number of Exposures for HDR
Today’s Question: One thing I’ve never understood is all the stacking for HDR. I’ve done that and it’s cool and all but in normal conditions I simple take two exposures one for the darks and one for the light and then blend them. What is the purpose of taking more than two shots when you can capture all the darks and lights with two?
Tim’s Quick Answer: For high dynamic range (HDR) images you only need enough exposures to cover the full range of light from the darkest shadows to the brightest highlights. If two exposures are enough, there’s no need to capture more.
More Detail: You can most certainly assemble two exposures into an HDR image, or even just blend the two images with a layer mask in Photoshop. However, more often than not I find that in situations where a single exposure won’t cover the full range of contrast in a scene, two exposures isn’t quite enough either.
To start with, I recommend separating exposures for HDR by two stops. If you separate by more than two stops, you may not have enough overlap in the tonal range for the exposures, causing problems for the final HDR image. You can separate exposures by less than two stops, but there’s no benefit to doing so.
Another consideration is that it is often easiest to use automatic exposure bracketing (AEB) to capture the exposures for an HDR image, in part to enable you to have those exposures captured in a short a time period as possible to avoid changes between exposures in the scene you’re photographing. Most cameras default to three exposures for bracketing, though many cameras offer additional options such as to bracket five, seven, or nine exposures.
I often capture bracketed exposures in sets of five images, just to provide some insurance with the bracketing, and to avoid needing to frequently change the camera settings to capture a different number of bracketed exposures. But if you end up with more bracketed exposures than you really need, you can exclude the unnecessary exposures when assembling an HDR image or even delete the exposures you don’t need.
![]()
Image Quality with PNG versus JPEG
Today’s Question: Using Android Open Camera, which image mode provides better image quality, PNG or JPEG?
Tim’s Quick Answer: The PNG option will provide better image quality than the JPEG option. That also means, however, that the PNG files will generally take up considerably more storage space than the equivalent JPEG images would.
More Detail: The PNG (Portable Network Graphics) file was introduced in many respects as a higher-quality option to the JPEG (Joint Photographic Experts Group) file format. However, the PNG file format has not seen anywhere near the wide adoption of JPEG files. Therefore, not many cameras offer PNG capture, while nearly all offer JPEG as a capture format.
If image quality is your primary concern, PNG is a better option than JPEG. Just be aware that the PNG files will be considerably larger than JPEG images, so will consume more space. That translates into not being able to capture as many PNG files as JPEG images on a given storage device.
For example, a JPEG that is around 13MB in size would translate to a PNG file of about 32MB in size. That’s a pretty significant increase in file size. In fact, in many cases a raw capture will be smaller than a PNG file, and so raw (or DNG) can be a better solution when image quality is your primary concern. A raw capture contains more bit depth, for example, with a file that will generally be smaller than an equivalent PNG file because the image data for a raw capture generally only contains one of the three RGB color values for each pixel.
![]()
Dealing with Out-of-Gamut Colors
Today’s Question: When you see a large amount of out-of-gamut color on an image (like most of the reds on a male vermillion flycatcher), should you just let the software figure out how to bring them into gamut and is that what the proof setup shows, or should one adjust something (and, if so what) to bring the colors into gamut?
Tim’s Quick Answer: In general, the software you’re using for printing will do a good job of converting the colors based on the output limitations. However, you may want to consider a different print configuration, or to apply some adjustments to compensate.
More Detail: Today’s question is a follow-up to a recent question about previewing what a print will look like on your monitor display via the soft proofing feature that is available in Photoshop and Lightroom Classic. In particular, it relates to the Gamut Warning feature that is available in Photoshop but not Lightroom Classic. This is an overlay that indicates which areas of an image contain colors that cannot be produced accurately with the intended printer, ink, and paper combination.
When you print a photo that has out-of-gamut colors, the colors that are out of gamut will automatically be shifted to a color value that can be printed. With the Relative Colorimetric setting for the rendering intent, any out-of-gamut colors will be shifted to the closest printable value. With the Perceptual setting, all colors in the image will have their saturation reduced to the point that out-of-gamut colors can be printed. I generally prefer to use Relative Colorimetric because it maintains the accuracy of most colors in the print.
Many printers use a single set of inks, and so the real variable (other than using a different printer) is to consider different papers. For example, a glossy paper will generally have a color gamut that is quite a bit wider than with an uncoated matte paper. So, if you find significant areas of the photo are out of gamut with a particular matte paper, you might consider a semi-gloss or glossy option instead.
You can also apply adjustments to the image to try to compensate for color that are out of gamut. However, this can often lead to unintended consequences. For example, you could shift the hue of the reds so they are perhaps a bit more orange, bringing them back into gamut. However, that can also lead to a situation where the color fidelity is obviously wrong, and worse than would have been achieved by simply letting the software manage the colors as part of the printing process.
![]()
Evaluating Noise Performance
Today’s Question: What would be the best way to determine at what point the higher ISO settings start to degrade image quality? I am guessing take the same exact shot at the lowest ISO setting and then work your way up to a high ISO setting. Then compare at 200% or 300% magnification. What exactly should I be looking for in the magnified image?
Tim’s Quick Answer: Yes, I recommend capturing test photos at different ISO settings, and then evaluating the results. It is a subjective decision, but you’re both learning how your camera behaves in terms of noise at different ISO settings, and also getting a sense of at what setting the noise tends to be beyond your comfort level.
More Detail: With most cameras you’ll see increased levels of noise as you increase to higher ISO settings, and with many cameras the noise can really start to be a problem as you get up above around 1600 ISO or so.
There is also variation in terms of the light levels in the scene, as well as other factors such as increased noise with long exposures. I therefore recommend capturing test photos of a scene that includes a relatively wide range of tonal values, from dark shadows to relatively bright highlights. I also recommend avoiding long exposures for the baseline testing, such as by using a relatively wide-open lens aperture so that even at a low ISO setting the shutter speed will be reasonably fast. You can separate the exposures by one stop, which means doubling (or halving) the ISO setting for each photo. For example, you could set the ISO to 100, then 200, then 400, and so on.
I then recommend zooming in to evaluate the images at about 100% as well as at about 400%. It can be helpful to cycle through the images multiple times to get a better sense of the noise behavior. I also suggest making sure you have captured a sample photo at the highest ISO setting your camera offers. There’s a good chance that when you look at that image up close, you’ll immediately conclude there is too much noise. This can help provide some context when evaluating the other photos.
There’s a very good chance (depending on your camera) that you’ll start to see that the noise is more obvious especially as you get up to the image at around 800 or 1600 ISO. Some cameras will have relatively problematic noise at lower ISO settings, and some provide relatively low noise at high settings.
Noise can be exhibited as both significant tonal variations and color variations at the pixel level. Noise will also be more prevalent in the shadow areas of the image rather than highlight areas. It can be helpful to brighten the images you’re evaluating so you can better see the noise that may be present in the shadow areas.
Again, this is a somewhat subjective evaluation, but the aim is to get a sense of what ISO setting start to be problematic in terms of noise from your perspective. Based on that, you can do your best to try to stay below the threshold you’ve decided on, to the extent that the circumstances will allow you to keep the ISO value below that level.
![]()
Aperture Priority or Manual
Today’s Question: Can you clarify what you meant when you said that you “think about exposure based on compensation”, in the context of preferring aperture priority mode?
Tim’s Quick Answer: I tend to think about setting exposure on my camera based on how the meter is likely to be “fooled” by the scene in front of the lens. Based on this mindset, I find it more intuitive to set an exposure compensation setting in conjunction with a semi-automatic exposure mode, rather than potentially needing to constantly evaluate and refine the exposure settings in manual exposure mode.
More Detail: My overall view about establishing exposure settings on your camera is that it doesn’t matter what approach you use as long as you can arrive at appropriate settings confidently and relatively quickly. My view is that whatever approach resonates with you is probably the best approach to use unless there are other reasons to choose a different approach.
When I evaluate a scene in front of my lens, I’m often considering how the meter is going to be “fooled” by the scene. Based on this, I find it easiest to refine exposure based on applying exposure compensation. Furthermore, depth of field tends to be a priority for me in many cases, and so I tend to favor aperture priority mode. Therefore, I find it most comfortable to use aperture priority, dial in the lens aperture I want to use, and then apply an exposure compensation adjustment as I deem appropriate.
I could certainly use manual mode, adjusting the shutter speed after establishing my preferred lens aperture, to the point that the meter shows the applicable level of exposure compensation. However, for situations where I’m photographing various areas of a scene and therefore needing to adjust exposure based on framing, I find it much faster and easier to use exposure compensation combined with aperture priority mode, for example, rather than having to more frequently adjust exposure settings in manual mode to manually compensate for exposure changes.
I should hasten to add that in many cases manual mode can offer advantages that are more important than the factors that cause me to usually favor aperture priority mode. For example, if I’m photographing a moving subject such as a bird in flight with a fixed lighting condition but variable background as the bird moves across the scene, locking specific exposure settings in manual mode can be far and away the best approach.
Ultimately, whatever approach you’re most comfortable with and that will enable you to establish accurate exposure settings as quickly as possible is probably the best approach. I pretty much never use fully automatic exposure modes, but if they work for you then I think it is perfectly fine to use them. But I also don’t think it makes sense for photographers to try to “force” themselves to use manual exposure mode if they’re not comfortable with it in certain situations.
Use the camera settings and options that best help you achieve good exposures consistently, and whatever that consists of I would say represents a good approach for you.
![]()
Assembling HDR in Camera Raw
Today’s Question: I used to be able to open and merge photos to HDR [high dynamic range] in Camera Raw, but either I’ve forgotten how or something has changed. Can you advise me?
Tim’s Quick Answer: You can assemble high dynamic range (HDR) images in Camera Raw by opening multiple photos, selecting them on the filmstrip, and then right-clicking and choosing “Merge to HDR” from the popup menu.
More Detail: I’ve found that many photographers have overlooked the fact that you can assemble HDR images in Camera Raw (as well as Lightroom and Lightroom Classic). This can be an important detail, because in my experience you can expect better HDR results using Camera Raw as compared to the related feature within Photoshop.
I recommend initiating the process of assembling an HDR image from Adobe Bridge, to make it easier to select the multiple bracketed exposures and open them in Camera Raw. After selecting the images, you can simply double-click one of the selected thumbnails to open them all in Camera Raw.
If the filmstrip isn’t displayed automatically in Camera Raw, you can toggle its visibility by clicking on the filmstrip button to the right of the zoom setting popup ate the bottom-left of the Camera Raw interface. Select all the photos on the filmstrip (such as by pressing Ctrl+A on Windows or Command+A on Macintosh), then right-click on one of the thumbnails and choose “Merge to HDR” from the popup menu.
This will bring up the HDR Merge Preview dialog, where you can adjust the settings for the image processing. Then click the Merge button, and the HDR image will be created. You’ll be prompted to save the image, and the result will open in Camera Raw so you can refine the adjustment settings before opening the final result.
![]()