Color Labels for Folders and Collections

Facebooktwitterlinkedin

Today’s Question: I recently saw a presentation where you said that you should not rename color labels for photos in Lightroom Classic, because it will cause existing color labels to change to white instead of the assigned color. Does the same apply to the ability to rename color labels for folders and collections, or is it OK to rename those?

Tim’s Quick Answer: You can indeed rename the color labels for folders and collections (but not photos) in Lightroom Classic without any negative impact on your workflow.

More Detail: While color labels for photos, folders, and collections in Lightroom Classic are obviously much the same, they do behave differently for photos versus folders or collections. As such, the way you work with these different color labels can be a little different.

Color labels for folders are applied directly to the metadata for individual photos, and the text shown for the color label definition determines what text is added to metadata for photos. You can review the definitions by selecting Metadata > Color Label Set > Edit from the menu while in the Library module.

Because the text that defines color labels for photos is added to the metadata for individual photos, changing the definitions after you’ve added color labels to photos will cause a mismatch. That will cause the affected photos to appear with a white color label rather than the color you originally assigned.

This issue does not apply to color labels for folders and collections, because those color labels are only stored within the Lightroom Classic catalog, not in metadata for the source photos.

You can therefore freely change the color label definitions for folders and collections, such as to provide a reminder of the meaning you’ve assigned to these color labels.

In the “Edit Color Label Set” dialog (Metadata > Color Label Set > Edit) I therefore recommend keeping the definitions for the Images tab set to the “Lightroom Default” preset. You can then change the definitions on the Folders or Collections tab to provide a reminder of the meaning you’ve assigned to those color labels. Doing so will not alter the color labels you’ve already assigned to folders or collections.

Backup Drive Strategy

Facebooktwitterlinkedin

Today’s Question: My backup hard drives are typically larger than my photos drive. Consequentially, I backup to my larger backup drive in a folder labeled accordingly. Then I can backup images from another drive to another folder on my larger backup drive. I then can back up my backup drive to the cloud and feel relatively safe that I have a good backup of the images that I want to protect. Does this sound reasonable? I am on Windows 10. Should I make the drive letters fixed? Should I change the disk volume labels to a more descriptive name?

Tim’s Quick Answer: This is all reasonable, though I do suggest having two local backup copies rather than just one. I do recommend assigning a permanent drive letter for Windows users, but on Windows there’s no need to change the volume label.

More Detail: As I explained during my presentation on “Backup Best Practices” during my recent GreyLearning Ultimate Event on “Backing Up Your Photos”, I recommend following the “3-2-1 Rule” for backing up photos and other important data. This involves having three copies of your data (including the original), two of which are stored locally, and one of which is stored offsite. So I would suggest having an additional backup drive locally, in addition to the workflow you’re already using.

I do recommend locking in a drive letter for external drives on Windows. In the context of a backup job, for example, this will ensure that the source and destination drives are always clearly identified by the software. If you don’t select a specific drive letter for each drive, then connecting the drives in a different order can result in a different drive letter assignment for each.

You can change the drive letter assignment on Windows with the Disk Management utility that is included with the operating system. In Disk Management you can right-click on a hard drive and choose “Change Drive Letter and Paths” from the popup menu. In the dialog that appears click the Change button. Select a new drive letter from the popup and click OK to close the dialogs.

For example, you might assign the drive letter “D:” to a data drive and “F:” to your photos drive, to help you remember which is which. You can then assign later drive letters to your backup drives.

For Windows users there’s no need to change the volume label for a drive, though you can certainly do that if you find it helpful to keep track of what each drive is used for. For Macintosh users I do recommend using a meaningful volume label for each hard drive, as this is how the drive is identified in the Macintosh operating system. To rename the volume label on Macintosh you simply right-click on the hard drive and choose “Rename” from the popup menu.

I talked about my recommended strategies for backing up your photos in my recent online event on “Backing Up Your Photos”. The recordings of the presentations from that event are available here:

https://www.greylearning.com/courses/greylearning-ultimate-event-backing-up-your-photos-may-2023

Cropping to Specific Aspect Ratio

Facebooktwitterlinkedin

Today’s Question: How do you crop to set dimensions in Photoshop, such as 5×7 or 8×10?

Tim’s Quick Answer: You can establish a specific aspect ratio for cropping in Photoshop using the settings on the Options bar with the Crop tool.

More Detail: When you select the Crop tool in Photoshop by clicking on its button on the toolbar or pressing the letter “C” on the keyboard, the Options bar across the top of the Photoshop window will update to reflect the settings for the Crop tool. This includes controls for the crop dimensions toward the left side of the Options bar.

If you click the Ratio popup toward the far left of the Options bar, you can select among a variety of preset aspect ratios, such as 1:1 (square), 4:5 and 5:7. You can also select “Ratio”, and then enter values in the two text boxes to the right of the popup. The first of these two is for the width, and the second is for the height. There’s a button in between the two checkboxes that allows you to quickly exchange the two values, such as to switch between a horizontal and vertical crop.

If you select the “W x H x Resolution” option, then a third text box will appear for the resolution. This enables you to not only crop to a specific aspect ratio, but also to resize the image to specific dimensions.

Note, by the way, that you can also crop to a specific aspect ratio when processing a raw capture in Camera Raw. After selecting the Crop tool within Camera Raw you can click the Preset popup to select the ratio you want to use for cropping, including being able to choose “Custom Ratio” to enter your own values.

Editing with Free Adobe Bridge

Facebooktwitterlinkedin

Today’s Question: Regarding Adobe Bridge being free, does it give access to Adobe’s editing software?

Tim’s Quick Answer: No, if you’re using Adobe Bridge without a paid Creative Cloud account you don’t have access to any of the photo-editing applications from Adobe. That includes not being able to access Camera Raw from within Adobe Bridge unless you’ve paid for a Creative Cloud plan.

More Detail: As mentioned in an earlier Ask Tim Grey answer, you can use the Adobe Bridge browser and organizing software completely free just by creating a free Adobe ID. However, you won’t have access to other editing applications from Adobe such as Photoshop, Camera Raw, or Lightroom Classic, unless you sign up for a paid Creative Cloud subscription.

You could obviously sign up for the Adobe Creative Cloud Photography Plan subscription to gain access to Adobe Photoshop and Adobe Lightroom Classic. You could also purchase a copy of Adobe Photoshop Elements (which does not require a subscription) if you wanted to use the Photoshop Elements Editor in conjunction with Adobe Bridge for organizing your photos.

You could also use Adobe Bridge in conjunction with any other application that allows for direct photo editing, using Bridge to organize your photos and the other software to optimize your photos. That includes applications such as Affinity Photo, Luminar NEO, Capture One Pro, ON1 Photo Raw, and many more.

Extra-Low ISO Settings

Facebooktwitterlinkedin

Today’s Question: I am curious about the option on my Nikon D7500 to use an ISO setting BELOW the last numbered ISO of 100 (Lo 0.3 to Lo 1.0, equivalent to ISO 80-50). I am wondering what if any effects on recorded image quality this extra-low ISO option might have?

Tim’s Quick Answer: In general, I would opt not to use special ISO settings that go below the base level for a camera, as it will generally result in reduced dynamic range.

More Detail: Various camera models from several manufacturers include special ISO settings that are below the base level. When an extended ISO setting that is below the base ISO for the camera is used, the image is over-exposed and then adjusted in-camera to darken the image. This results in slightly reduced dynamic range and a risk of clipping in bright highlights. Noise levels are not impacted by using these lower ISO settings.

While in general these extended low ISO settings produce good results, I personally prefer to avoid them in the interest of maintaining dynamic range. The main reason to use one of these extended low ISO settings would be to achieve a longer exposure duration. However, with most cameras the most you can go below the base ISO by up to one stop, which I don’t find to be compelling considering the minor risks to image quality.

Instead of using the ISO settings below the base setting, I recommend using a solid neutral density filter when you need a longer exposure. Otherwise, I would stick with the base ISO setting whenever possible to minimize noise, and a higher ISO setting as needed for a faster shutter speed.

Virtual Copy Without Edits

Facebooktwitterlinkedin

Today’s Question: If I edit my original photo [in Lightroom Classic] and then make a virtual copy, the copy will inherit the edits from the original (as your article in Pixology noted). Is there any way at that point to make a copy of the unedited original?

Tim’s Quick Answer: After creating a virtual copy based on an original image you’ve already edited in Lightroom Classic you can then reset the Virtual Copy to return it to the default adjustment settings.

More Detail: You can create a virtual copy of an image in Lightroom Classic by right-clicking on the image and choosing “Create Virtual Copy” from the popup menu. When you do so that copy inherits the metadata and adjustment settings from the image you created the virtual copy from.

With the virtual copy selected, if you then click the Reset button at the bottom of the right panel in the Develop module, the virtual copy will be reset to the default adjustment settings. You could then start applying a new set of adjustments to the virtual copy.

If you wanted some but not all the adjustments from the original image applied to the virtual copy you could still reset the settings for the virtual copy as above, but then synchronize adjustments from the original image to the virtual copy. To do so select both the original image and the virtual copy, and then click the thumbnail for the original image so it is the active image. Then click the “Sync” button at the bottom of the right panel. In the dialog that appears turn on the checkboxes for only the adjustments you want to copy from the original to the virtual copy, and click the Synchronize button.

Adobe Bridge is Free

Facebooktwitterlinkedin

Today’s Question: I searched through the Adobe website and found it difficult to get this simple question answered: “Is Adobe Bridge free to download and install when using Photoshop Elements or Photoshop/Lightroom?”

Tim’s Quick Answer: Yes, Adobe Bridge is available for free for anyone to download and use. It does, however, require a (free) Adobe ID account.

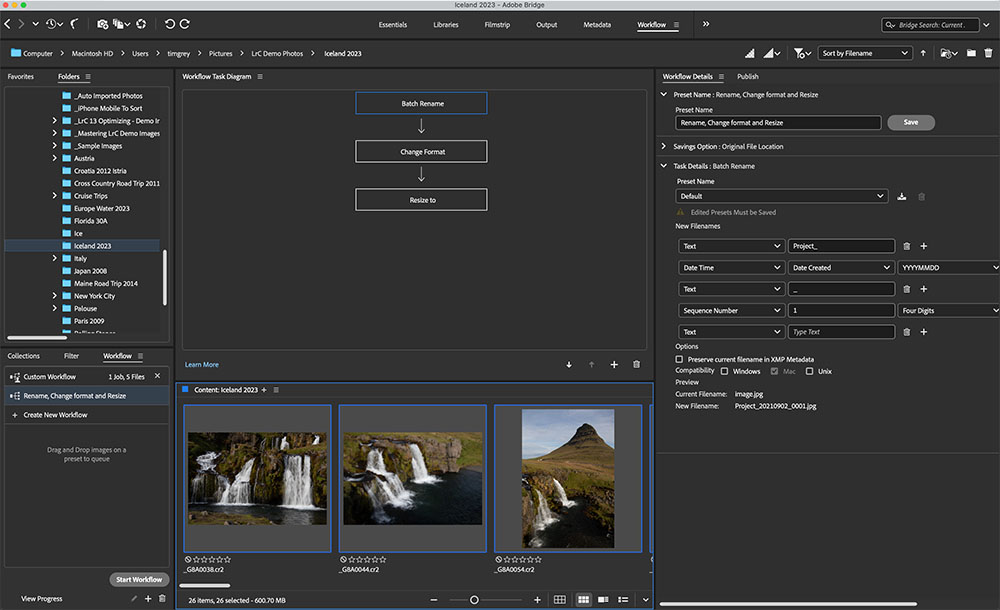
More Detail: Adobe Bridge is completely free, but you do need an Adobe ID in order to install the software. If you’re starting without an Adobe ID, I recommend making sure that you simply create a new Adobe ID account rather than starting a free trial. If you start a free trial you would need to be sure to cancel it within seven days to avoid being charged.

You can get started by pointing your web browser here:

https://creativecloud.adobe.com

At the top-right corner, click the “Sign In” button. On the “Sign In” page that appears, click the “Create an account” text to get started setting up your free account. Once you’ve created that free account, you can sign in here to find the applications, including Adobe Bridge, that you have access to with a free account:

https://creativecloud.adobe.com

A free Adobe Creative Cloud membership includes additional benefits beyond free access to Adobe Bridge. You can learn about those benefits here:

https://helpx.adobe.com/creative-cloud/help/benefits-creative-cloud-free-membership.html

Reposition Image in Photoshop

Facebooktwitterlinkedin

Today’s Question: Is there a way to have the document window in the workspace automatically align to top left instead of center when using the “fit on screen” or “print size” options?

Tim’s Quick Answer: While you can’t have the image automatically aligned differently within the canvas, you can move the image into a different position with the Hand tool as long as you enable the “Overscroll” setting.

More Detail: When you use the “Fit on Screen” or “Print Size” commands from the View menu in Photoshop, the image will be centered in the canvas area. While you can’t change this behavior within Photoshop, you can move the image into a different position using the Hand tool.

First, you need to make sure the “Overscroll” checkbox is turned on. Bring up the Preferences dialog by choosing Edit > Preferences > Tools on Windows or Photoshop > Settings > Tools on Macintosh. On the Tools tab find the “Overscroll” checkbox, and turn it on if it isn’t already. Then click the OK button to close the Preferences dialog.

You can then select the Hand tool from the toolbar, or by pressing the letter “H” on the keyboard. With the Overscroll option turned on, the image can be dragged around within the canvas area with the Hand tool, positioning the image anywhere you’d like. This isn’t as convenient as if you could change the automatic positioning of the image, of course, but it does provide a similar result.

Note, by the way, that you can also move the image around within the canvas by switching to a floating window rather than a docked image. You can put the image into a floating window by choosing Window > Arrange > Float in Window from the menu.

Converting to CMYK

Facebooktwitterlinkedin

Today’s Question: Is it possible in Lightroom Classic to convert a file to CMYK as can be done in Photoshop?

Tim’s Quick Answer: No, it is not possible to convert an image to CMYK color in Lightroom Classic, so you would need to use other software such as Photoshop.

More Detail: Lightroom Classic does not support the CMYK color mode. This might seem odd considering you can print photos from Lightroom Classic to printers that use CMYK (cyan, magenta, yellow, and black) inks. However, these printers still process RGB rather than CMYK color data, so CMYK color is not used in the workflow for printing a photo to a photo inkjet printer.

When exporting photos from Lightroom Classic you have the option to select a color profile to assign to the image, but that list will only include RGB profiles, not CMYK profiles. Therefore, if you need to convert an image to CMYK, you’ll need to use other software such as Photoshop.

If you need to convert an image to CMYK I strongly recommend obtaining a profile for the specific output conditions, and then converting to that profile. You can perform this conversion in Photoshop by choosing Edit > Convert to Profile from the menu. You can then select the profile from the Profile popup in the Destination Space section of the Convert to Profile dialog. You can configure the other settings in the Conversion Options section, and then click the OK button to convert the image.

In general, you should not use the Image > Mode > CMYK Color command, as this simply converts the image to the CMYK color space based on the CMYK working space profile defined in the Color Settings dialog. Unless you’ve configured the CMYK working space profile based on the output you’re producing, this would not yield good results.

I should hasten to add that in most cases I don’t recommend that photographers convert images to CMYK in the first place. For most output you can employ RGB images. If CMYK files are required, I generally recommend having the provider who will be printing the images perform the CMYK conversion, as they will generally have the expertise to ensure optimal results for the specific output conditions.

Pixology Magazine May 2023

Facebooktwitterlinkedin

The May 2023 issue of Pixology magazine is now available, featuring the following articles:

  • Blend Modes in Photoshop: Explore adjustments and creative possibilities using layer interactions.
  • Guided Upright for Perspective: Learn how you can solve a common perspective problem with remarkable ease.
  • Spot Metering: Learn to leverage the benefits of setting exposure based on a small area of a scene.
  • Photo Versions in Lightroom Classic: Learn about different options fr exploring different possibilities for a photo.
  • Photo Story: Wet Feet: Sometimes you have to get your feet wet to find the best light.

Pixology magazine is included in the GreyLearning Ultimate Bundle, and is also available as a standalone subscription here:

https://www.greylearning.com/courses/pixology-magazine