Safely Traveling with Photo Gear

Facebooktwitterlinkedin

Today’s Question: My question is regarding domestic and overseas travel by air with my camera gear. What precautions do you recommend regarding security and protection of photo gear? Have you found TSA approved case locks to be adequate? Domestic and international? I have a rigid, internally padded waterproof case with provisions for 2 padlocks.

Tim’s Quick Answer: Whenever possible, I recommend traveling with your most important gear in your carry-on bag. If you need to pack some gear in your checked luggage, I recommend ensuring that you have the equipment insured, which may require (or benefit from) providing a list of gear with serial numbers to your insurance provider.

More Detail: When traveling with photo gear there is obviously the risk of damage, theft, or lost luggage. Naturally, we want to minimize the risks to our photo gear when traveling.

First and foremost, I recommend keeping all gear in your carry-on bag if possible. If the gear won’t all fit, I suggest prioritizing based on the most important or most valuable items. For example, I will often put my tripod and ball head into a checked bag, along with some of my accessories such as chargers and filters. I wrap these items in clothing or otherwise ensure they will be safe from damage due to rough handling of the luggage.

While I do recommend using a lock for your checked baggage, it is important to keep in mind that locks must be TSA-approved and should not be considered entirely safe. The master keys for these locks can be found beyond the TSA staff who require that they be able to access your bag if they feel a search is warranted. In other words, people other than the TSA can simply unlock your bag with a contraband master key.

Insuring your gear can help manage a situation where the gear is lost, stolen, or damaged. Note that in some cases you will need to register the gear with serial numbers for it to be covered, or to avoid a situation where you aren’t insured for the full value.

Another option is to ship your larger gear to your destination using a shipping service such as DHL, FedEx, or UPS. Be sure to adequately insure the items with the shipping provider when using this approach. You might also consider in some cases renting specific gear at your destination, rather than traveling with it, to avoid the risk of loss or damage during your travels.

There’s no question that putting your camera gear in checked luggage can be somewhat stressful, as you’re hoping the gear actually makes it to your destination. While I’ve never had camera gear go missing during air travel, I have had bags get lost forever by the airline (fortunately not the bag that had photo gear in it). There’s always a risk, so the key is to mitigate the risk as much as possible.

Resolving Mysterious Metadata Mismatches

Facebooktwitterlinkedin

Today’s Question: A ton of my images in Lightroom Classic have appeared with the upward arrow and the following message: “The metadata for this photo has been changed by another application. Should Lightroom import settings from disk or overwrite disk settings with those from the catalog?” I have not knowingly done anything to the image to provoke this. How can I correct this, preferably in bulk?

Tim’s Quick Answer: If you’re certain that you haven’t made any updates to metadata outside of Lightroom Classic, you can use the option to overwrite the metadata for the images based on your catalog. This update can be performed in batch for a group of selected photos.

More Detail: If you update the metadata for photos outside the Lightroom Classic catalog, you’ll see an icon at the top-right of affected photos indicating that there is a mismatch. You can also view the status with the Metadata Status field available by selecting IPTC view option from the popup to the left of the Metadata heading on the right panel in the Library module.

If you updated metadata for photos outside of Lightroom Classic, such as by adding keywords using Adobe Bridge, this would obviously lead to a mismatch. However, even opening a raw capture in Photoshop via Camera Raw will cause a metadata update that can trigger the message you’re seeing.

If you’re confident that the Lightroom Classic catalog represents all the correct metadata for your photos, you can update the files on the hard drive to match the catalog, which will cause the metadata mismatch message to go away.

You can select multiple photos to update all at once, including selecting all photos in the “All Photographs” collection in the Catalog section at the top of the left panel in the Library module, if you want to update every photo in the entire catalog. Select all the photos you want to update (you can even select those that don’t have a mismatch), and then click the button to the far right of the Metadata Status field in the IPTC metadata within the Metadata section of the right panel. In the dialog that appears you can click the “Overwrite Settings” button to update the metadata for the files on the hard drive, so there is no longer a mismatch.

Note, by the way, that I recommend turning on the “Automatically write changes into XMP” checkbox on the Metadata tab of the Catalog Settings dialog to ensure that all standard metadata updates in Lightroom Classic are saved to the source image files as well.

Avoiding Halos with Black and White Conversion

Facebooktwitterlinkedin

Today’s Question: I converted a photo to black and white in Lightroom Classic, then darkened the sky. This resulted in halos along the edges of tree branches. I was able to correct this in Photoshop using the Clone Stamp tool set to darken. Is there a way to prevent this from happening or an easier way to correct this?

Tim’s Quick Answer: These types of halos can result from a targeted adjustment that requires more feathering, or too strong an adjustment for the black and white mix.

More Detail: With the masking features in Lightroom Classic, this type of issue can be challenging to resolve. When you use an automatic mask for the sky, for example, you can’t adjust the blending along the edge of the sky and the rest of the image. If you use the Auto Mask feature for the Brush tool, you similarly can’t adjust the feathering of the edge after the fact to modify the transition. For this type of scenario Photoshop provides better solutions than Lightroom Classic.

If you’re converting to black and white and then adjusting the mix, so that you can for example darken the blues for the sky and brighten the greens for the landscape, a strong adjustment can result in obvious halos. The easiest solution in this situation is to use reduced settings that don’t create as much contrast between neighboring areas of different underlying colors.

If you’re not able to improve the halo issue using one of the above methods, you’ll generally have significant work involved in improving the image.

One option would be to refine the mask for the targeted adjustment manually, so that you adjust the size and position of the blending in the area where the halo appears, in order to reduce the contrast in that area. Another option is to use image cleanup techniques to remove the halos. This is best done with the Clone Stamp tool in Photoshop or the Clone option for the Healing tool in Lightroom Classic. However, you would need to use a rather small brush and paint very carefully along the edge, so as to not alter the texture along the edge of the areas of transition, such as the tree branches in this example.

Excluding the Sky from Sharpening

Facebooktwitterlinkedin

Today’s Question: In Lightroom Classic, if I do not want sharpening applied to the sky, I do not include the sky in the masked area that I want to sharpen. Am I correct?

Tim’s Quick Answer: Correct. If you define a mask that excludes the sky for a targeted adjustment, sharpening (and other targeted adjustments for the same mask) will not apply to the sky. You can also use the more detailed sharpening controls for a global adjustment, increasing the value for the Masking slider to avoid sharpening smooth areas such as the sky.

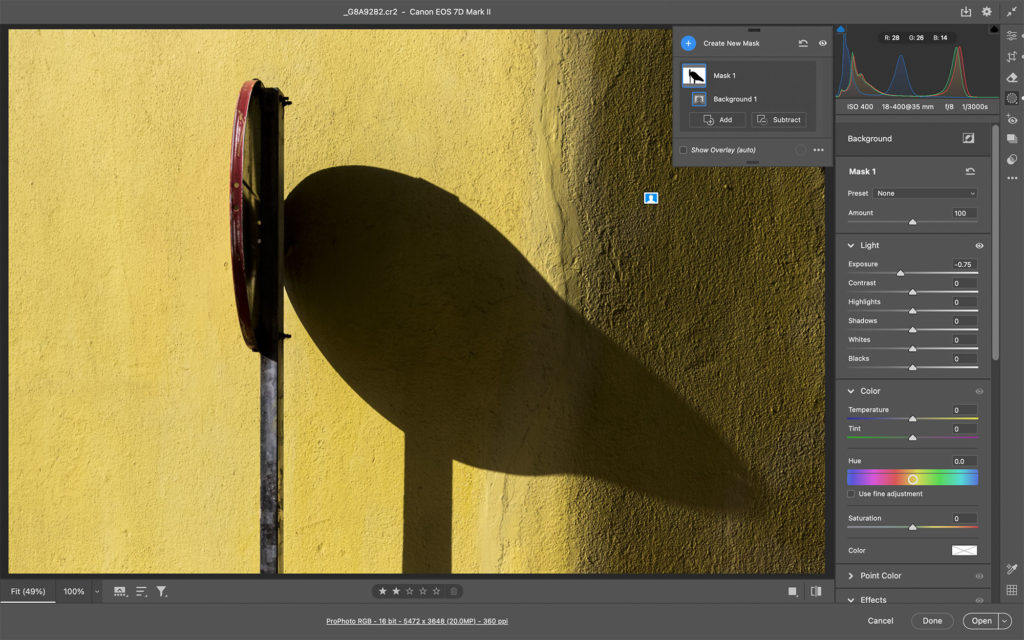
More Detail: The masking features of Lightroom Classic enable you to apply adjustments that only affect specific areas of a photo. If you define a mask for the entire foreground of a photo that excludes the sky, for example, you could apply sharpening and other adjustments that would affect the foreground but not the sky.

In many cases, however, you can achieve the same result for targeted sharpening more easily by using the Masking slider for the sharpening controls found in the Detail section of the right panel in the Develop module.

When you increase the value for the Masking slider, you will gradually focus the sharpening effect so that it applies to areas that have texture, without affecting areas of smooth texture such as the sky.

To get a better sense of the right setting for the Masking slider, hold the Alt key on Windows or the Option key on Macintosh while dragging the slider. This will display a black and white preview over the image, where white areas indicate portions of the image that will have sharpening applied and black areas indicate areas that will not be sharpened. In this example you could hold the Alt/Option key until the sky area is entirely black and the rest of the image is entirely white in the preview, or as close to that as possible to focus the sharpening only where you want it.

Generative Fill for Frame Extension

Facebooktwitterlinkedin

Today’s Question: In your article on extending the frame of a photo using Photoshop [in the June 2023 issue of Pixology magazine] you explained how Content-Aware Fill could be used to add pixels in an area where you’ve extended the frame of a photo. Could the new Generative Fill feature be used in a similar way to extend the frame?

Tim’s Quick Answer: It is indeed technically possible to extend the frame of an image using the Generative Fill feature in the public beta version of Photoshop. However, two key shortcomings limit the effectiveness of this option.

More Detail: The Generative Fill feature available in the public beta version of Photoshop is based on artificial intelligence (AI) technology, and in some respects is rather impressive. Certainly, there is significant future potential for this technology.

While the feature is primarily aimed at filling a selected area of a photo with new details, it can also be used to extend the frame of an image. You would start by using the Canvas Size command (Image > Canvas Size) to extend the frame by the amount needed in the desired direction.

You could then create a selection of that area of extended canvas, overlapping the selection slightly with the existing image. You could then use the Generative Fill command to fill that area automatically. If you leave the text field blank when you apply Generative Fill, it will operate in a way that is similar to the Content-Aware Fill command, using the existing image to determine what should be added to the selected area.

However, there are two significant limitations to be aware of. First, the current beta of Generative Fill only fills based on an area of 1024×1024 pixels. If you select an area larger than 1024 pixels then the pixels added to fill the selection will be scaled up, which can result in significantly degraded image quality in the filled area. In addition, the results produced by Generative Fill cannot be used commercially, so you would not be able to sell or otherwise license the resulting image.

Of course, the biggest limitation of all right now is that the results of Generative Fill are quite mixed, and in some cases not very good at all. You can see some examples of that in Episode 33 of my series “Tim Talks”, which focused on Generative Fill. You can learn more about “Tim Talks” here:

https://www.greylearning.com/courses/tim-talks-weekly

Because of the limitations of Generative Fill, I recommend extending the canvas of an image by either duplicating existing pixels or using the Content-Aware Fill command, or a combination of both. This was covered in the June 2023 issue of my Pixology magazine for photographers, which you can learn more about here:

https://www.greylearning.com/courses/pixology-magazine

Estimating Long Distances

Facebooktwitterlinkedin

Today’s Question: During your presentation on calculating depth of field with PhotoPills you seemed to estimate distances to the subject rather accurately. Were you just guessing at the distance, or is there some way to measure the distance?

Tim’s Quick Answer: For the closer distances I was estimating based on my recollection of the situation. But for the larger distances I cited, I used Google Maps to calculate the distance from my position to the subject I was focusing on.

More Detail: During my presentations as part of my GreyLearning Ultimate Event on “The Power of PhotoPills”, I shared some examples where the distance to the subject was a factor, such as when calculating depth of field. For smaller subjects that I was positioned close to, I estimated the distance to the subject to the best of my ability. But for the larger scenes with greater distances to the subject I made use of the measurement feature of Google Maps.

To get started in your web browser, go to Google Maps (https://www.google.com/maps). Search or otherwise navigate to the area of the map you want to measure a distance for. As an example, during one of my presentations I talked about photographing an area of the small town of Steptoe from the top of Steptoe Butte. So in this case I would navigate within the map to the town of Steptoe.

You can then right-click on the subject you want to measure the distance to (in this case it was a set of grain elevators in the town) and choose “Measure distance” from the popup menu. You can then navigate on the map to the location you captured the image from and click to set that as the other end of the range to measure. In my example that was from Steptoe Butte, and the distance was about three miles away.

For this type of measurement, it can be helpful to use the satellite view option rather than the standard map, so you can see a view of the actual objects in the area.

If you missed my presentations as part of the GreyLearning Ultimate Event on “The Power of PhotoPills”, recordings are available with the course found here:

https://www.greylearning.com/courses/greylearning-ultimate-event-the-power-of-photopills-june-2023

Open Images as Layers in Photoshop

Facebooktwitterlinkedin

Today’s Question: I have six images that I want to open as one new PSD file with six layers. The only way I know how to do that is to open all six images, pull five of them off the dock, and copy those layers onto the first one. Is there some way to open all of these images as layers in a single PSD?

Tim’s Quick Answer: Yes, you can open all the images as layers in a single document by using the “Load Files into Photoshop Layers” command in Adobe Bridge or the “Open as Layers in Photoshop” command in Lightroom Classic.

More Detail: While you can certainly drag image layers from one document to another in Photoshop to create a composite with multiple image layers, it is much easier to automate that process from either Bridge or Lightroom Classic, depending on which software you’re using.

In Adobe Bridge you can select the images you want to assemble into a composite, and then go to the menu and choose Tools > Photoshop > Load Files into Photoshop Layers”. If you’re using Lightroom Classic to manage your photos, you can select the images and then from the menu choose Photo > Edit In > Open as Layers in Photoshop.

With either command all the images will be opened into a single document, which each image being a layer in that composite. On the Layers panel each layer will be named based on the filename for the source image. You can then rearrange, resize, mask, or otherwise work with all the layers in that composite document. Save the result as either a Photoshop PSD or a TIFF image so you can preserve the layers for future modification as needed.

Automated HDR Panoramas

Facebooktwitterlinkedin

Today’s Question: I often capture composite panoramas, and in many cases I will create these in HDR [high dynamic range]. Currently, I assemble an HDR for each frame of the panorama, and then assemble those HDR images into the final panorama. Is there a way to automate this process, such as with an action in Photoshop?

Tim’s Quick Answer: Yes, you can assemble an HDR Panorama very easily in a single step using either Lightroom Classic or Adobe Camera Raw with the HDR Panorama option for Photo Merge.

More Detail: With Lightroom Classic or Adobe Camera Raw you can assemble bracketed exposures into a high dynamic range (HDR) image, you can assemble individual frames into a composite panorama, and you can also assemble an HDR panorama.

With an HDR panorama instead of capturing individual frames across a scene that you’ll stitch together into a seamless panorama, you would capture bracketed exposures for an HDR image for each frame of the panorama. Assembling the result used to mean that you first needed to create an HDR image based on each frame, and then assemble those HDR images into the final panorama. Now, however, you can process the images in a single step.

To get started in Lightroom Classic simply select all images captured for the HDR panorama, which would include all bracketed images for each frame of the panorama. For example, if you bracketed each image with five exposures, and the panorama consisted of four frames, you would have a total of twenty images to select. After selecting the images go to the menu and choose Photo > Photo Merge > HDR Panorama.

For Photoshop users you can start by selecting the raw captures in Adobe Bridge, then double-click one of the selected photos to open them in Camera Raw. On the filmstrip select all the images, and then click the “more” button (the three dots icon) that appears at the top-right of the thumbnail when you hover your mouse over it. From the popup menu that appears choose “Merge to HDR Panorama”.

In the dialog that appears you can configure the settings for the panorama. Note that when using the HDR Panorama option the Align option is automatically enabled and you can’t turn it off. Deghost is disabled, and can’t be enabled. After configuring the other settings click the Merge button and the full HDR panorama will be assembled.

Compound Layer Masks

Facebooktwitterlinkedin

Today’s Question: In a recent Ask Tim Grey response you described the capabilities within Lightroom Classic to create compound masks [for targeted adjustments]. Does Photoshop have these same capabilities and, if so, how does one use them?

Tim’s Quick Answer: Yes, Photoshop does support building composite masks for targeted adjustments (or composite images), through the use of multiple layer masks in conjunction with layer groups.

More Detail: In Lightroom Classic you can use one or more components to define a mask that determines which portion of an image will be affected by a targeted adjustment. This consists of adding to or subtracting from an initial mask using various other mask shapes. For example, you could create a mask for the sky, and then subtract the adjustment from the lower portion of the sky using a linear gradient.

In Photoshop you can create much the same type of effect, using a series of layer masks combined through the use of layer groups.

Of course, you could get started with the same basic concept by using selection tools. For example, let’s assume you had a photo showing three hot air balloons in the sky. You could create a selection of the first balloon, then use the “Add to Selection” option to create a selection of the second balloon. By then using the same “Add to Selection” option to select the third balloon, you would then have a selection that represented all three balloons. You could then add an adjustment layer based on that selection, for example, so that only the three balloons would be affected by the adjustment.

Layer groups provide a bit more flexibility. Let’s assume the same example of an adjustment that affects the sky, but in a gradient fashion. This can be accomplished with a composite mask created by combining multiple layer masks using layer groups. To get started, add two layer groups by clicking the folder icon at the bottom of the Layers panel, and then clicking that folder icon again.

Next you could select the sky by choosing Select > Sky from the menu. Then click on the thumbnail for the lower of the two layer groups on the Layers panel, and click the Add Layer Mask button (the circle-inside-a-square icon) at the bottom of the Layers panel. If you then add one or more adjustment layers to this layer group, those adjustments will only affect the sky in the image.

To refine that mask so that the sky is affected in a gradient fashion, click to select the upper layer group. Then click the Add Layer Mask button, choose the Gradient tool, and draw a white-to-black gradient from the upper portion of the sky to the lower portion. At this point the gradient mask layer won’t have any impact on the image because there is nothing inside that layer group. However, you can drag the lower layer group into the upper layer group, and now both layer masks will affect all adjustment layers in the lower layer group.

This is just one simple example, but it illustrates the possibilities of creating compound layer masks in Photoshop through the use of nested layer groups.

GreyLearning Ultimate Event: The Power of PhotoPills

Facebooktwitterlinkedin

Registration is now open for my next live online GreyLearning Ultimate Events, focused on “The Power of PhotoPills”. The live online event will be on Wednesday, June 21st, from 1pm to 5pm Eastern Time.

The PhotoPills app for iOS and Android mobile devices provides photographers with a variety of powerful planning tools. With this app you can calculate equivalent exposure settings, such as when adding a solid neutral density filter. You can calculate depth of field with precision, including being able to take into account the effect of hyperfocal distance. You can plan for the specific position of the sun and moon, both for planning for light and for including the sun or moon in the frame with a key subject. And there is so much more to explore in PhotoPills beyond these powerful features!

All GreyLearning Ultimate Events are included at no additional cost in my GreyLearning Ultimate Bundle (http://timgrey.me/atg99bundle). Recordings of all presentations will also available, so you can watch even if you can’t attend live, or review the presentations at any time.

If you’re not a GreyLearning Ultimate Bundle subscriber, that’s OK! Non-subscribers can attend the live online event and access recordings of all presentations for just $20.

You can get all the details of this upcoming live online event here:

https://www.greylearning.com/courses/greylearning-ultimate-event-the-power-of-photopills-june-2023

I look forward to helping photographers make the most of the remarkable PhotoPills app with this upcoming GreyLearning Ultimate Event!