Cloud Storage is Optional in Lightroom

Facebooktwitterlinkedin

Today’s Question: I was intrigued to read about your new course on the cloud-based version of Lightroom, in particular because you indicated it now supports working with local photos. Does that mean you could use the updated Lightroom without uploading any photos to the cloud?

Tim’s Quick Answer: Correct. With the cloud-focused version of Adobe Lightroom (meaning not Lightroom Classic) it is now possible to store photos locally, in the cloud, or any combination of both. In addition, Lightroom does not involve the use of a catalog the way Lightroom Classic does.

More Detail: For photographers who have followed any of the developments related to Lightroom and Lightroom Classic, and in particular those who have noted the challenges photographers have faced with Lightroom Classic that I’ve addressed in my email newsletter, the recent update to Lightroom is certainly a reason to pay attention.

Put simply, in addition to being able to import photos into the Lightroom desktop application and have them stored primarily in the cloud, with the latest update to Lightroom you can also now browse photos stored locally.

This enables a completely new approach to your workflow with Lightroom, and may even convince photographers who have been frustrated by the catalog to switch from Lightroom Classic to Lightroom. You could use Lightroom to manage photos that you only store locally, for example, similar to using Adobe Bridge to browse photos, but with the added benefits of a more integrated workflow.

You could also use Lightroom primarily to manage photos stored locally in a folder structure you define and manage, and then only import selected photos that you want to have available across the full Lightroom ecosystem by storing those photos in the cloud.

And of course, some photographers may prefer to import all photos into Lightroom so that every photo is synchronized to the cloud, so they are available from virtually anywhere with an internet connection, using the Lightroom desktop app, the Lightroom mobile app, or Lightroom in a web browser.

In part because of the new possibilities afforded by this recent update to Adobe Lightroom, I am back in the studio to produce a comprehensive new video course focused on organizing, optimizing, and sharing photos with Adobe Lightroom. You can learn more about this course (and get a pre-order discount of over 50% off) on the GreyLearning website here:

https://www.greylearning.com/courses/mastering-adobe-lightroom-cloud-2024

Image Stroke Options

Facebooktwitterlinkedin

Today’s Question: In Photoshop, the Stroke option is available both under Edit on the menu and as a layer style. What is the difference between the two? When I add a Stroke as a layer style it does not always show up on my image even though it shows up on the Layers panel. What am I doing wrong?

Tim’s Quick Answer: Choosing Stroke from the Edit menu in Photoshop applies the stroke directly as pixels on the image, while using the layer style adds a non-destructive stroke that is editable. If a stroke isn’t appearing on the image, it is most likely because it was added outside the image area.

More Detail: A stroke is a border around the perimeter of an image (or image layer), which can be added in a couple of different ways in Photoshop.

The approach I recommend is to add a stroke as a layer style, so that you maintain greater flexibility. With this approach you can think of the stroke as being similar to an adjustment layer, in that the image layer is not altered directly. Instead, the stroke is applied as an effect to the applicable layer, and you can always double-click on that effect to bring up the dialog that enables you to change the settings for the stroke.

If you choose the Stroke command from the edit menu the stroke is applied as pixels directly to the current image layer. You aren’t able to modify the stroke after the fact, other than using the Undo command to remove the stroke and then add it again with different settings.

If you add a stroke and it doesn’t appear on the image, the most likely reason is that the Location/Position setting was set to Outside, which adds the stroke outside the current image layer. If that image layer fills the entire canvas, your stroke will be hidden from view. You can choose Image > Reveal All from the menu to expand the canvas to reveal the additional stroke, but you can also set the Location/Position option to Inside so that the stroke will be positioned within the image area. Just keep in mind that with the Inside setting the stroke will cover up pixels around the perimeter of the image.

It is also possible that you reduced the setting for Opacity or used an option for Blend Mode that makes it difficult or impossible to see the stroke effect. By adding the stroke effect as a layer style you’ll maintain the option to easily refine the settings for the stroke as needed. Note that you can add a stroke as a layer style by clicking the “fx” button at the bottom of the Layers panel or by going to the menu and choosing “Layer > Layer Style > Stroke.

Advanced iPhone Calculator

Facebooktwitterlinkedin

Today’s Question: I was reading your very interesting article on bit depth in Pixology magazine, and wanted to follow along by doing the math involved with bit depth. However, the calculator on my iPhone only provides basic functions without support for exponents. Is there an app you recommend that provides more advanced functions?

Tim’s Quick Answer: You can actually calculate exponents and other advanced math operations by simply rotating your iPhone to horizontal when using the built-in Calculator app.

More Detail: At first glance the default Calculator app included on the iPhone seems to only offer the very basic mathematical operations of addition, subtraction, multiplication, and division. However, that’s only the case when holding the iPhone vertically, in which case you’re only seeing the basic calculator.

If you rotate your iPhone to horizontal (making sure that rotation isn’t locked) the Calculator app will switch to scientific mode. This will provide you with significantly more options for calculations, including exponents and roots, trigonometric functions, and more.

In the article on bit depth in the December 2023 issue of my Pixology magazine, I outlined the math involved with calculating how many tonal and color values would be available at different bit depths.

For example, with 8-bit per channel you can calculate the number of shades of gray available on each channel by raising two to the power of eight. On a scientific calculator that would involve using the “x to the y” button, which shows the letter “x” with the letter “y” in superscript to indicate an exponent. You can press the number 2 (the base in this case), then the “x to the y” button, and then the number 8 (the number to raise to), which will provide you with the result of 2 raised to the power of 8, which is 256.

To calculate the total number of color values available for an 8-bit RGB image, you need to take the value of 256 and raise it to the power of three. This is represented as the “x to the power of 3” button, which shows the letter “x” with the number “3” in superscript. So, you can simply enter “256” and then press the “x to the power of 3” button to get the result of 16,777,216 total possible tonal and color values for an 8-bit per channel RGB image.

4K Resolution in Megapixels

Facebooktwitterlinkedin

Today’s Question: I’m seeing a lot of references to 4K resolution, especially for video capture on cameras and monitors. But what does 4K translate to in terms of camera resolution in megapixels that is more familiar to photographers?

Tim’s Quick Answer: 4K resolution is equivalent to about 8.3 megapixels, for both video cameras and monitor displays that feature 4K resolution.

More Detail: Most 4K displays and video capture have a resolution of 3,840×2,160 pixels, though there is some variation in the specific pixel count in both directions. To determine the number of megapixels based on pixel resolution, you simply multiply the number of pixels across by the number of pixels down, and divide by one million.

So, in this case, assuming a resolution of 3,840×2,160 pixels, the total number of pixels is 8,294,400. Divided by one million (or moving the decimal to the left six places) yields 8.2944, or about 8.3 megapixels.

Metadata Lost with DNG Conversion

Facebooktwitterlinkedin

Today’s Question: Am I loosing anything by converting files from Canon raw format to Adobe DNG? I’ve read that it is better to use the camera manufacturer’s raw format rather than DNG because the camera manufacturer may include data that DNG doesn’t include or support. Yet, I’ve never seen anyone name any such data. Do you know of any examples of data that are in native raw files that are excluded from a derived DNG file?

Tim’s Quick Answer: If you convert raw captures to Adobe DNG files and discard the original captures, the only potential information that could be lost would be “private” metadata. This is generally information that requires software from the camera manufacturer to access, with one example being the automatic sensor dust spot cleanup feature available on some models of Canon cameras.

More Detail: When you convert an image from a proprietary raw capture format to an Adobe DNG file you are retaining the original capture data as well as the standard metadata recorded at the time of capture. That metadata would include things like the details about the camera and lens used, the exposure settings, and more.

In addition to the standard metadata fields that are recorded by the camera, there may be some “private” metadata that is created by the camera but not necessarily openly documented. This type of metadata is often referred to as “maker notes” because they are a form of notes recorded by camera for purposes of the company that made the camera.

As noted above, one example of information saved in maker notes supported by some Canon cameras relates to the feature for automatic dust spot removal. When this feature is enabled, the camera determines where there are dust spots or other blemishes on the image sensor, and what amounts to a map of where those spots are is recorded into the maker notes for the capture. That metadata is not available to third party software, which means you need to use Canon’s software to make use of the data to perform an automatic image cleanup.

If you’re not making use of any features that can only be accessed using software from your camera manufacturer, and you don’t anticipate needing to make use of such a feature later, then it is safe to convert your raw captures to Adobe DNG files.

Synchronizing Photos for Sharing

Facebooktwitterlinkedin

Today’s Question: I know that when you take photos with your phone you don’t keep them there. But surely you do have photos on your phone and I’m wondering what your workflow is for that and where you keep them. Do you use a synched Lightroom Mobile album or something else?

Tim’s Quick Answer: I happen to synchronize selected photos to my smartphone directly from my computer through the operating system. However, in general I consider synchronizing collections from Lightroom Classic to the Lightroom mobile app to be an excellent approach.

More Detail: In my view one of the most convenient ways to synchronize selected photos to a smartphone is to enable synchronization for selected collections in Lightroom Classic. Those collections and the photos they contain will then appear as albums in the Lightroom app on your smartphone.

The only reason I don’t make use of the option to synchronize photos from Lightroom Classic to the cloud so they are available in the Lightroom mobile app is that you can only synchronize a single catalog, and I need to be able to use that feature when teaching Lightroom Classic. I therefore have synchronization enabled for my current demo catalog, not the primary catalog that I use to manage all my photos.

If not for this issue, I would simply turn on synchronization for the collections in my Lightroom Classic catalog that I want to share, and those collections would appear as albums in the Lightroom app on my smartphone.

Therefore, I find it easiest to use computer-based synchronization for this purpose. I use an iPhone, and so I’m able to configure synchronization settings through the operating system when my iPhone is connected to the computer via USB. After connecting my iPhone to the computer, I can select it through the operating system similar to selecting an external hard drive. I can then go to the Photos tab and configure the settings for which images I want to synchronize. I maintain various folders to which I export copies of photos from Lightroom Classic that I want to be able to share.

My preference is to not keep new photos on my smartphone for very long. I download new photos, import them into Lightroom Classic, and delete them from my smartphone. I then use synchronization to make only selected photos available on my smartphone so I can easily share them with others directly on my device.

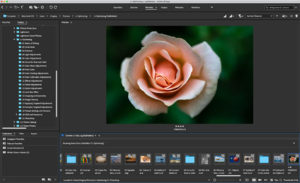
Collections in Adobe Bridge

Facebooktwitterlinkedin

Today’s Question: In reading the article on collections in Adobe Bridge [in the November 2023 issue of Pixology magazine] I wondered, is doing this an alternative to Collections in Lightroom Classic for someone who doesn’t use Lightroom?

Tim’s Quick Answer: Yes, collections in Adobe Bridge function much the same as collections in Lightroom Classic, including both normal collections and smart collections.

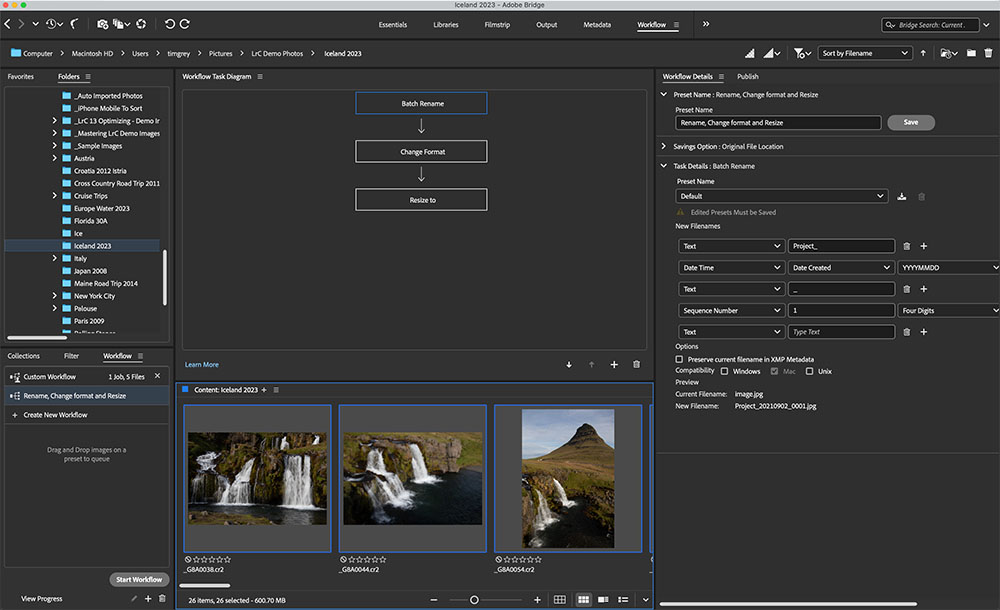
More Detail: In Adobe Bridge you can create collections to group photos together beyond the folder structure in much the same way that you can create collections in Lightroom Classic. This includes the ability to create a normal collection that you manually add photos to, as well as the ability to create a smart collection that is essentially a saved search result based on metadata criteria you define.

Adding photos to a collection is simply a way to group those photos together. The images in a collection are simply references to the original, so you aren’t making copies of the source files or moving them to a different storage location, for example.

There is one potentially significant limitation of collections in Bridge compared to Lightroom Classic. Because Bridge doesn’t employ a catalog the way Lightroom Classic does, you can only view the photos in a collection if the source files are currently available. For example, if you store your photos on an external hard drive and that drive is not connected to the computer, Bridge will show the images as missing, and you won’t be able to see thumbnails for the photos within the collection until the source files are available again.

Lightroom Classic, on the other hand, enables you to see all photos in folders and collections even if the source files are not currently available, provided previews have already been generated for the images. That’s because the information about the photos as well as previews for the photos are stored as part of the catalog.

Despite this limitation in Bridge compared to Lightroom Classic, the ability to create collections in Bridge is a very useful feature. I discussed collections in Bridge in detail in an article in the November 2023 issue of my Pixology magazine for photographers, which you can learn more about here:

https://www.greylearning.com/courses/pixology-magazine

Optimal Monitor Brightness

Facebooktwitterlinkedin

Today’s Question: Is there a suggested monitor brightness that should be used? I’m not interested in calibration but rather the brightness in cellphone, laptop, and computer monitors. I usually set brightness between 70-80% and some shared images are very dark until I go to 100% brightness.

Tim’s Quick Answer: In the absence of calibration, and when simply viewing images rather than editing them, I generally find that a brightness setting of around 80% works well. However, the best setting can vary significantly with changing ambient lighting conditions.

More Detail: When calibrating for print I typically recommend a brightness of 120 cd/m2 (candelas per square meter). This helps ensure a relatively accurate view of the image on your monitor in terms of what would be expected when the image is printed. However, this also requires relatively dark viewing conditions so you’re able to see the image effectively at the reduced brightness setting.

In the absence of calibration, you’re really depending on your own evaluation of the brightness level of the display in the context of the current lighting conditions. And especially if the lighting levels are significantly variable, you’ll need to make significant adjustments to the display.

So, when you want to have an accurate view of an image for optimizing and especially when the intent is to print, I strongly recommend calibrating the display to a target brightness of about 120 cd/m2 and working in a relatively dark environment when evaluating the image on your monitor display.

Otherwise, you can certainly adjust the brightness of the display to compensate for the ambient lighting conditions, but keep in mind that making adjustments under those circumstances may not yield optimal results. If the display is too bright, you’ll tend to make the image too dark, and vice versa.

This is also the reason that images received from others might look too bright or too dark. Without calibration on both sides, the image may not be optimized properly, and you may not be getting an accurate view of the image.

So, in general I find that a brightness level of around 80% works well, there are a number of variables that will cause you to need different settings in different circumstances. And when complete accuracy is your goal, it is best to calibrate and work in a relatively dark environment.

Facebooktwitterlinkedin

The January 2024 issue of Pixology magazine is now available, featuring the following articles:

  • Local Browsing in Lightroom “Cloud”: The cloud-focused version of the Lightroom desktop application now supports local photo storage.
  • Lens Blur Effect: Learn to reduce depth of field after the capture with Lens Blur.
  • Texture Blending: Learn to combine images in Photoshop to add interesting textures to a photo.
  • Keyword Cleanup: Tidy up the Keyword List in Lightroom Classic to help streamline your organizational workflow.
  • Photo Story: Bilbao: After an earlier missed opportunity, I brought my camera to Bilbao, Spain.

Pixology magazine is included in the GreyLearning Ultimate Bundle, and is also available as a standalone subscription here:

https://www.greylearning.com/courses/pixology-magazine

Photo Count Discrepancy

Facebooktwitterlinkedin

Today’s Question: I noticed that I have a discrepancy in my Lightroom Classic catalog that I can’t explain. I have all filters off, but Lightroom says I have 88,298 of 93,730 photos. I’m not sure why that with all filters off there is a discrepancy. Does that make sense to you, or is there something else I am missing?

Tim’s Quick Answer: In this scenario I’m sure the mismatch is simply due to some of your photos being grouped into stacks that are collapsed within Lightroom Classic. If you expand all stacks (Photo > Stacking > Expand All Stacks) with the filter set to None then you’ll be viewing all photos within the catalog.

More Detail: In Lightroom Classic you can stack photos together so that when the stack is collapsed a single thumbnail represents the full stack of photos. By default, when you merge photos into a high dynamic range (HDR) image or a panorama, the source photos and the assembled image are grouped together into a stack. You can also stack photos together manually.

If any stacks of photos are collapsed, with a single thumbnail representing the group of images in the stack, Lightroom Classic counts the stack as a single image. Therefore, you would see an indication that you are browsing a portion of the images, such as text that indicates “9,500 of 10,000 photos”. This text is found toward the top-left of the bottom panel, above the filmstrip of thumbnails. If all photos are shown there is simply an indication of the total number of photos currently being browsed.

As today’s question suggests, if you have applied a filter to your images then the number displayed would be less than the total number of photos. You might, for example, set a filter to only see images with a star rating, so you would only be browsing a portion of the images based on how many have the applicable star rating.

If you have selected “None” on the Library Filter bar then you would naturally expect that you would be seeing all photos in the location you’re currently browsing. However, as noted above, collapsed stacks result in some photos being hidden from view, and Lightroom Classic takes that into account when indicating how many photos are being browsed.

You can expand all stacks in the current location by going to the menu and choosing Photo > Stacking > Expand All Stacks. If you want to collapse all stacks in the current location, you can choose Photo > Stacking > Collapse All Stacks from the menu instead.