Update Metadata for Multiple Photos

Facebooktwitterlinkedin

Today’s Question: I know how to change the metadata for one photo [in Lightroom Classic], but for some reason it doesn’t change the metadata when I select multiple photos. I know I must be missing a simple step, but I have not figured out what that step is.

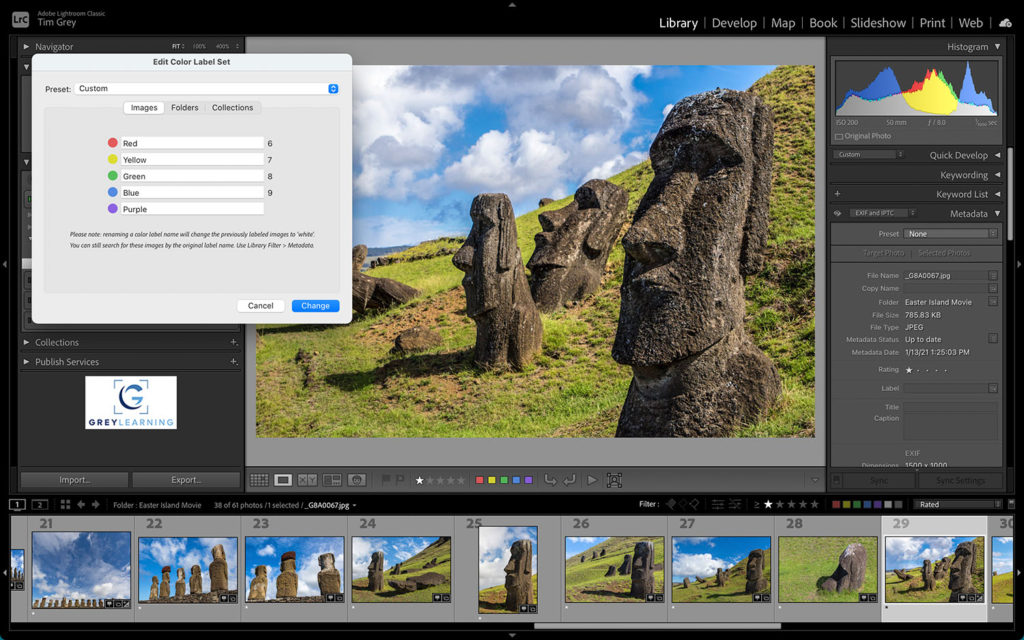
Tim’s Quick Answer: The simple step in this case is to make sure you are in the grid view when you want to update metadata for multiple photos in the Library module of Lightroom Classic. In the grid view metadata updates will affect all selected photos.

More Detail: The issue outlined in today’s question relates to what I refer to as the “loupe view snafu” in Lightroom Classic. If you select multiple photos but are using the loupe view display, metadata updates will only affect the photo shown in the preview area, not the multiple photos selected on the filmstrip.

The idea is that since the loupe view shows a single photo, you are always updating only that single photo even if multiple images are selected on the filmstrip. When you’re in the grid view, you’re seeing multiple photos, and so if multiple of those photos are selected then metadata updates will affect all selected photos.

When you want to update the metadata for multiple photos I recommend switching to the grid view to select those photos rather than selecting them on the filmstrip. This will help get you in the habit of switching to the grid view when you want to update multiple photos, so you won’t be as likely to have the issue where you’re not updating all selected photos.

Note by the way that it is also possible to turn on automatic synchronization for metadata when you’re in the loupe view. After selecting multiple photos on the filmstrip, you can click the toggle button (it looks like a light switch) to the left of the Sync button. This will cause the button to switch to “Auto Sync”, so that metadata updates will affect all selected photos even though you’re in the loupe view.

However, in my view using the Auto Sync option increases the risk that you’ll forget to check the status of the toggle before applying updates. Therefore, I recommend keeping the Auto Sync option turned off, and instead simply use the grid view when you want to update multiple photos or the loupe view when you want to update a single photo.

Monitor Display Performance

Facebooktwitterlinkedin

Today’s Question: What differences will be obvious in photo images when viewed on a 4K monitor vs a 2K monitor if both are 27-inch? Does it make any sense to operate a 4K monitor in 2K resolution to improve apparent sharpness / contrast?

Tim’s Quick Answer: The key difference between a 4K versus 2K monitor display is the greater sharpness on the 4K display. To me a 4K display set to 2K resolution is optimal, because the interface is a good size, but the image quality is still stunning.

More Detail: A 4K display has a resolution featuring approximately 4,000 pixels across (actually 3,840 pixels in most cases) versus about 2,000 pixels across for a 2K display (usually 1,920 pixels). Therefore, the size of the individual pixels on a 4K display will be smaller than on a 2K display, assuming monitors of the same size.

That means you can display significantly more information on a 4K display, such as being able to see more of a high-resolution image at a 100% zoom setting on a 4K display compared to a 2K display. However, a 4K display set to a 4K resolution, especially on a relatively small monitor, can result in interface elements and text that are so small it can be difficult to work with.

However, a 4K display will present a significantly sharper image compared to a 2K display. Therefore, in my view the optimal approach is to opt for a 4K display but set it to about a 2K resolution (such as 1920×1080 pixels). This will provide you with what I think is a more manageable size for the interface elements and text, while still providing the benefit of superior sharpness for the presentation of images.

Contrast and other display qualities will depend upon the specific specifications of the display, not the resolution. For example, the contrast ratio and color space support determine the dynamic range and color gamut the display can reproduce, regardless of the resolution of the display.

Pixology Magazine April 2024

Facebooktwitterlinkedin

The April 2024 issue of Pixology magazine is now available, featuring the following articles:

  • Creating Silhouettes: Get tips for creating dramatic images with a silhouetted foreground subject.
  • Keeping Notes in Photoshop: Add reminders directly to an image with the Note tool in Photoshop.
  • Saving Map Locations: Save favorite locations for quick access to photos in Lightroom Classic.
  • Lens Corrections: Easily compensate for the behavior of a lens with profile-based corrections.
  • Photo Story: In the Fog: Get the story about how dreary weather added a moody effect for a simple scene.

Pixology magazine is included in the GreyLearning Ultimate Bundle, and is also available as a standalone subscription here:

https://www.greylearning.com/courses/pixology-magazine

Applying a Preset in Batch

Facebooktwitterlinkedin

Today’s Question: You mentioned applying a preset to multiple photos using Quick Develop in the Library module in Lightroom Classic. How exactly do you do that?

Tim’s Quick Answer: You can apply a preset in batch to multiple images either by using the Saved Preset popup in Quick Develop in the Library module, or by enabling automatic synchronization in the Develop module.

More Detail: When you want to apply a single preset to a batch of photos in Lightroom Classic, I recommend using the Quick Develop section on the right panel in the Library module. Start by selecting all the photos you want to apply the preset to, but make sure you are in the grid view (not the loupe view) so that you’re viewing thumbnails in the main preview area. That will ensure the preset will apply to all selected photos, rather than only a single photo if you’re in the loupe view.

With the photos selected in the grid view display, select the desired preset from the Saved Preset popup in the Quick Develop section of the right panel. The preset will be applied to all selected photos, and you’ll see their thumbnails update accordingly.

It is also possible to enable automatic synchronization when applying a preset in the Develop module. I don’t generally recommend this approach, however, because it is easy to forget that you have synchronization enabled, in which case you would be updating multiple photos when you thought you were working on only the single photo shown in the preview area.

If you want to apply a preset to multiple photos while in the Develop module, select all the photos on the filmstrip on the bottom panel, and then click the toggle switch (it resembles a light switch) on the left side of the Sync button. This will enable automatic synchronization, and the button will now show “Auto Sync”. Then apply the desired preset from the Presets section of the left panel, and all selected images will be updated accordingly.

If you do make use of automatic synchronization in the Develop module, I do recommend turning it off again with the toggle switch on the Sync/Auto Sync button, just to make sure you don’t continue to update multiple selected photos when that wasn’t your intention.

Inverting Negative Images

Facebooktwitterlinkedin

Today’s Question: Is there a way to create a preset in Lightroom Classic for changing a B&W negative into a positive image? I am scanning my negative film and thought there would be an easier method than using the sliders in the tone curve on each negative to turn it into a positive image.

Tim’s Quick Answer: Yes, you can create a preset that will streamline the process of converting a scanned negative to a positive image.

More Detail: It is worth noting that in most cases you can have the images inverted at the time of scanning. Scanning software will typically include an option to invert as part of the scanning process, and that often provides a more accurate positive image because it can take into account the fact that the original is a negative, not just an inverted source image.

The easiest way to invert a negative image in Lightroom Classic (or Camera Raw or Lightroom) is to use the Tone Curve using the point curve mode (not parametric mode). Drag the black endpoint at the bottom-left of the Tone Curve line to the top-left, and drag the white endpoint at the top-right of the Tone Curve line to the bottom-right.

You can also create a preset to make this even easier to apply to multiple images. Start by applying the desired adjustments to a sample image. You may want to include other adjustments, such as Clarity and Texture, for example.

When you’re ready to save a preset based on adjustments applied to a sample image, click the plus (+) icon to the right of the Presets heading on the left panel in the Develop module and choose Create Preset from the popup. In the New Develop Preset dialog enter a meaningful name for the preset in the Preset Name field, and choose which group you want to include the preset it from the Group popup.

Next, click the “Check None” button at the bottom-left of the dialog, then turn on the checkboxes for the adjustments you want to include in the preset, such as Point Curve, Clarity, and Texture. Click the Create button to save the preset, which you can then apply to multiple images at the time of import, to multiple selected photos in the Quick Develop section of the right panel in the Library module, or by selecting a preset for an image in the Develop module.

Hiding the Contextual Task Bar

Facebooktwitterlinkedin

Today’s Question: How do I get rid of the floating toolbar showing “Select subject – Remove background” that now pops up [in Photoshop]?

Tim’s Quick Answer: The toolbar in question is the Contextual Task Bar, and you can hide it by clicking the “more” button (with the three dots) and choosing “Hide bar” from the popup menu.

More Detail: The Contextual Task Bar is a relatively new toolbar in Photoshop, which by default will float over an open image. The toolbar is context-sensitive, meaning the specific controls that appear on the toolbar depend on the type of image that is currently active or the task you’re performing.

While the Contextual Task Bar can certainly be helpful in terms of having quicker access to tasks you might perform with an image in Photoshop, it can also be a bit of a distraction. Fortunately, while you can’t dock the Contextual Task Bar to put it in a preferred location, it is possible to hide it altogether.

You can hide the Contextual Task Bar by clicking on the “more” button at the right side of the toolbar and choosing “Hide bar” from the popup menu. You can also go to the menu bar and choose Window > Contextual Task Bar to hide or reveal the toolbar at any time. Once you’ve hidden the Contextual Task Bar it will remain hidden until you re-enable it.

Which Direction Should Subject Face?

Facebooktwitterlinkedin

Today’s Question: I’m wondering if you’ve ever heard the photo composition advice for birds that one should always make sure that birds are looking left in a photo composition, because it’s more pleasing to the viewer’s eye (since we always start viewing photos from the left to the right. I’ve never heard this advice before, and it certainly is a photo ethics concern for me. Your thoughts?

Tim’s Quick Answer: I have not heard this advice before, though it relates to a portion of the rule of thirds. However, I feel photos generally look better with the subject (bird or otherwise) pointing to the right rather than left.

More Detail: One of the corollaries of the rule of thirds in photography relates to having space in front of the subject, meaning space on the side where the subject is looking or moving toward. You can obviously break the rule of thirds with excellent results, but the principles do provide a good general guide for composition.

For example, if a person or bird is looking to the right side of the frame, you should generally have more space on the right side of the frame than on the left side, which provides the subject with room to look. Similarly, if you photograph an airplane that is flying from left to right, you generally want to have more space on the right side of the airplane, so it has room to move.

Taking that a step further is the notion of whether you should favor having a subject such as a bird facing to the left rather than the right. I have found some folks online who have shared or supported this advice, and even, as noted in today’s question, people who recommend flipping a photo so that the subject will face left rather than right.

Flipping a photo can obviously introduce issues related to photo ethics, with the “right” answer depending in large part on the type of photography and how it is being presented. But keep in mind that in many cases the subject may not look right if the photo is flipped, such as in cases where features are not symmetrical on both sides of the face.

As noted above, in reviewing a large number of photos of varying subjects, I very much prefer to have a subject facing to the right rather than to the left. To my eye it looks more natural to have the subject facing to the right. When a subject is facing to the left the photo looks a little less natural to me, and in some cases has a bit of a sense of tension in the photo (similar to how having a person’s face near the edge of the frame as though they are looking beyond the frame can introduce tension).

I don’t feel that there is universal enough opinion (or awareness) of this issue to warrant going out of your way to have a subject face one direction or the other. And I would generally want to avoid flipping a photo for that purpose. But I’m sure there are many who would disagree with my view that pointing to the right is better, and perhaps even more who wouldn’t feel strongly about favoring either direction for the subject to face.

Long Exposures with Smartphone

Facebooktwitterlinkedin

Today’s Question: I was reviewing your video course on long exposures [“Creative Blurs”, https://www.greylearning.com/courses/creative-blurs] and that got me wondering if those types of effects could be created with a smartphone.

Tim’s Quick Answer: Yes, it is possible to get photos with some degree of motion blur effect with a smartphone, but it is very difficult to control enough to get consistently good results.

More Detail: Smartphone cameras don’t enable us to control the exposure settings the same way you can with other cameras, and in many cases if you attempt to photograph a dark scene the smartphone will compensate such as by raising the ISO setting to compensate.

There are some apps that enable you to create long exposure effects with a smartphone. For example, the Lightroom mobile app includes options for adjusting exposure, including shutter speeds of up to one second. However, because you’re not able to adjust a lens aperture to reduce the amount of light, it can be difficult to get a long exposure except under dark conditions or by holding a neutral density filter in front of the lens.

There are other apps that enable you to capture long exposures more consistently, but most of these use a process of capturing a series of photos and blending them together, which doesn’t always result in a long exposure that looks like photos captured with the traditional photographic technique. These apps include Slow Shutter Cam and ProCam 8, for example.

In addition, the default Camera app for iPhone and iPad includes the ability to create a long exposure effect. This can be accomplished by capturing a photo in the Live Photo mode, and then browsing the photo and changing the “Live” popup to “Long Exposure”. This will take the multiple frames captured for the Live Photo and create a motion blur effect based on the variation of the frames.

Ultimately, while you can certainly achieve a long exposure effect with a smartphone, you’ll be able to get much better results using a proper camera instead.

Export versus Workflow

Facebooktwitterlinkedin

Today’s Question: Thank you for your excellent course on Adobe Bridge. In watching the lessons, I notice that the Export and Workflow features seem to have a lot of overlap, as they both involve exporting copies of photos. Do you recommend one over the other?

Tim’s Quick Answer: I recommend the Export feature over the Workflow feature, in large part because the Export feature is more streamlined and has less potential for confusion.

More Detail: The Export and Workflow features in Adobe Bridge are both focused on enabling you to create derivative copies of photos quickly and easily. In both cases you can define and save the parameters for how you want photos processed for a particular purpose, and then process selected photos in batch. Both are similar to the Image Processor feature in Photoshop that has long been accessible from Bridge as well.

There are two key differences between the Export and Workflow features. First, with Export you define all the settings for processing images within a single dialog, while with the Workflow feature you use a workspace to define individual components of a workflow. This makes the former a little more streamlined in my view, and the latter potentially a bit more confusing and cumbersome.

The other difference is that with the Export feature you don’t have the option to rename as part of the option to export photos. With the Workflow feature you can include a step to rename the copies of the photos you’re creating. However, since the renaming is template-based, this can actually be a bit problematic. For example, there isn’t an easy way to include custom text for each set of photos you create with the Workflow feature. You would need to use a custom workflow each time you wanted a different file naming structure when processing photos.

Therefore, I recommend the Export feature over the Workflow feature. If you also want to rename the photos after processing them with the Export feature, you can simply use the Batch Rename command (Tools > Batch Rename) to rename the exported copies of photos with flexibility, including the ability to use custom text as a component of the filenames.

Free Article: Solar Eclipse Preparation

Facebooktwitterlinkedin

There will be a total solar eclipse on Monday, April 8, 2024, visible to much of North America, and I have a free resource to help you prepare to observe and photograph this event.

The October 2023 issue of my Pixology magazine for photographers included an article with tips on preparing to photograph a total solar eclipse. I’m making that full issue of Pixology available free of charge, so that all photographers can make the most of the upcoming total solar eclipse if they’ll be in an area where it will be visible.

You can get the free issue of Pixology here:

https://www.greylearning.com/courses/solar-eclipse-preparation-free

Image Credit: Petr Mašek – Adobe Stock (stock.adobe.com)